Drop-in Drum Circle

Timothy Ballan – www.sbgc.org
– 
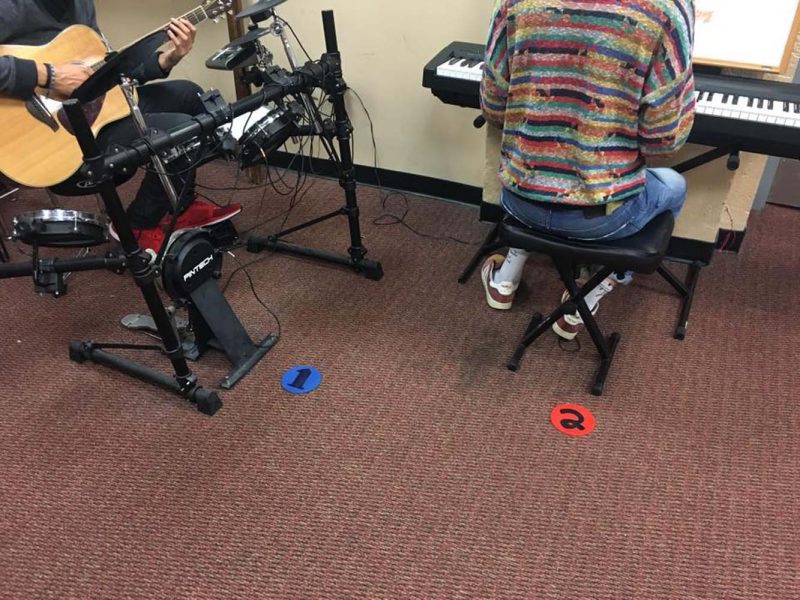
One simple program we have at the Springfield Boys and Girls Club is a weekly drop-in drum circle – I use authentic world instruments (although various household items could work as well!) 
  • A daily check-in allows each member to first play out and, if desired, describe how they feel on a chosen instrument.
  • Various drumming games are then used to warm up (like www.youtube.com/watch?v=eyOUlrk52ls)
  • The remainder of the time is spent: 
    • Jamming together
    • Rotating through each instrument
    • Playing along with popular music requests played over a speaker

The Egg Shaker Game

Teach participants to keep the beat while showing off their best dance moves – Submitted by Anne Joseph www.newcitykids.org/jerseycity
This game works for all music classes when you need to take a break on playing instruments. Use it as an icebreaker or to teach rhythm & tempo. 

1. Everyone stands in a circle, each with an egg shaker (you can also buy easter eggs and fill them with beads).
2. Everyone begins to shake a certain rhythm (quarter notes)
3. One person takes a step up and dances with their egg shaker for 2 counts of 4. (doesn’t matter the dance move, they just have to keep shaking the egg). Then that person takes a step back and continues the group shake beat. If there’s a student that doesn’t want to dance, they can pass to the next person.
4. This happens around the circle until it reaches the first person.
5. Then the game ends.

It’s a super simple game, that not only touches on rhythm & tempo, but also works on confidence, shows inclusion, makes students think on their toes, and is engaging for the whole class!

Round Robin Elimination

Don’t drop the beat or you’re out! – Submitted by Daniel DRoyul Cody – www.newcitykids.org/paterson

This is a bass guitar game we play (but you can use it with any instrument): 
  1. Make a circle with enough space for the basses and amps
  2. Pick a scale or song that you are going to play
  3. Start with one person playing the 1st note of the song/scale
  4. The next person will play the 1st and 2nd note of the song/Scale
  5. The next person will play the 1st, 2nd, and 3rd of the song/scale and so on and so on

If at any point the next person can’t play the succession of notes correctly, they are out. Similar to musical chairs, the number dwindles down, until one person is crowned the winner. They win whatever prize you have chosen for that game.

Music Timeline

Time to update your facilities artwork with this collaborative Music History project 

Let your participants take ownership of your music room by creating a full timeline of recorded music from the invention of the phonograph to the present day! Participants nominate and vote on the most influential or most iconic artist from each decade and assemble them into a chronological list. This is a great activity to expose teens to a ton of new artists; learn a lot about the history of music, and create some very cost effective artwork for your space

Read More

How to… 

  • Select artists from all eras of popular recorded music 
    • Have listening parties
    • Read bios
    • Watch YouTube videos 
    • Copy and paste pictures from the different websites into a Google spreadsheet
  • Research each artist beginning and ending career dates
  • Let the participants nominate and vote on the artists that they think should represent each era or genre
  • Print full list of pictures, artist names, and dates
  • Cut each element out and arrange them on a laminator sheet
  • Once laminated, have groups cut out each element and try to match, rearrange, and order the timeline on the floor
  • While your group is hanging the pictures, have a group of teens curate a playlist on Spotify or YouTube for each artist’s five most popular songs
  • Use the different colors of tapes to define each decade of artists
  • Find major music events throughout popular music to tape directly onto the middle of the timeline colored tape
  • Continually update the timeline 
  • Optional – include your participants in the timeline as well as a fun and motivational bonus! 

To download a full, editable version

“Music Workout” Circuit

Rotate participants through different instrument stations until they try them all – Submitted by Anders Paul Olson www.bgcb.org
If you want to orientate new musicians to your program, check out this “music workout” circuit. Just place numbers at instrument stations, and have students in small groups or individually rotate set to a time interval!
      

Explore similar resources in Instrument Programming

Youth Development Toolbox App

Throw music out the window and run an icebreaker instead – this App has lots of ideas – Submitted by Nick Tetrault www.westendhouse.org
I think it’s easy in music programs to jump right into music-related activities and not take important steps to get a group of kids comfortable with each other and the space.  For the first 10-15 minutes of my programs, I throw music out the window and I run a community builder or icebreaker.  It makes the remaining 45 minutes of programming so much more productive. This app (youth development toolbox) was put out by BGCA but anyone can use it for quick games, icebreakers, and community builders.

“Karate Belt” Reward System

Want ninja level musicians?! Help your participants earn a musical “black belt.”  

A black belt in karate is a badge of honor representing the highest level of skill. The “Karate Belt” Reward System uses different color guitar picks (similar to “karate belts”) to reward participants’ progress and motivate them to achieve their goals on instruments or music technology.

Read More

How to…

  • Determine what skills participants must demonstrate in order to “level up” on each instrument or music technology gear. Then print and display the “karate belt” requirements for each instrument.
    • The Sample “Karate Belt” Reward System Achievements chart below uses 5 colors, each representing different levels of achievement plus an exclusive club called “The Red-Hot Pick Society” for anyone earning a purple pick on 3 or more instruments
  • Create an incentive chart to visually track and help motivate participants’ achievements.
  • With help from instructors, participants work to earn each colored guitar pick to add to their necklace.
    • Note: If a participant earns their “Yellow” rank in more than one instrument, no need to give them another yellow guitar pick for their necklace. Instead, simply note their achievement on the incentive board.
  • Participants wear their multi-colored guitar pick necklace that proudly displays their rank.

The recommended equipment list below is an example that would serve approximately 30 participants. Your needs and quantities may vary (depending on # of participants).

Page 1 of 2 (full text available in download) 
To download a full, editable version 

Explore similar resources in Instrument Programming

New Participant Orientation Tools

Expecting lots of new kids this semester? Set them up for success with these handy tools!

Download the bundle of ALL of the New Participant Orientation Tools

or choose an individual resource

New Participant Orientation Process

New Participant Orientation Process

Help break the ice and welcome new participants so they can make music right away! ...
Establishing House Rules

Establishing House Rules

Set expectations and ensure proper use of the equipment and facilities. Your Music Studio likely ...
Equipment Orientation Worksheets

Equipment Orientation Worksheets

Focus on helping participants MAKE MUSIC right away by conducting short equipment orientations to get ...
Musical Poster Boards

Musical Poster Boards

Large posters you can print and hang in your music room to help remind participants ...

New Participant Orientation Process

Help break the ice and welcome new participants so they can make music right away!  

For participants new to your Music Studio, stepping into a recording studio or picking up an instrument for the first time can be intimidating. Some beginners are so excited to get started that they can hardly stand it! Others may feel intimidated, nervous, or shy.  One way to help new participants feel welcome is to implement an Equipment Orientation Process.

Equipment orientations are for first time users of music technology or instruments. The goal is to show new participants the basics of the equipment and get them playing as soon as possible. 

Read More

How to…

Orientations are a great way for the staff to get to know the participants on a personal level and a great way to start building trust.  Keep the orientations low key and low stress.  The primary goal is to make a new participant comfortable and to demystify instruments or production technology.  

Step One:

  • Orientations can be one-on-one or in a group setting.
  • Explain equipment rules and expectations to help prevent damage
  • Encourage participants to treat instruments and gear with respect

Step Two:

  • For instrumentalists
    • Explain the working parts of the instrument and how to hold it
    • Have them chose a simple popular song and teach them to play it right away
  • For producers
    • Have them produce a “demo”
    • The total project should be at least 32 bars long
    • Distinct “A” and “B” sections
    • Minimum of 5 tracks (At least one track performed live by the participant then quantized)     
  • Conduct a simple verbal “Quiz” to reinforce knowledge of the basics

Some helpful hints:

  • Avoid long lectures – Keep the orientation to 10-15 minutes max
  • Encourage participants to choose the equipment they want to try out, at their own pace 
  • Start with only “need-to-know” information to get some quick success
  • Help participants make music right away – keep it short and simple!

To download a full, editable version

You may also want to download… 

Download editable Sample House Rules 
Download the bundle of all Orientation Worksheets

Explore similar resources in Instrument Programming

Establishing House Rules

Set expectations and ensure proper use of the equipment and facilities.

Your Music Studio likely has a bunch of state of the art equipment – it should be viewed as a privilege for your teens to have access to this specialty program.  Setting appropriate expectations for behavior is a good way to reinforce a sense of ownership among the teens.  

We recommend establishing a set of House Rules, ideally with the input and buy-in from some of your participants. The rules set expectations for general behavior and for how to handle musical equipment.

A set of House Rules is intended to like a “contract”, where the participant agrees to a certain set of standards in order to have the privilege of accessing all the benefits of the program.  Use the example below to develop House Rules that make sense for your program.

Read More

How to…

While each music program is encouraged to establish their own set of “house rules” (based on your organization’s mission and core values) we have provided the following example:

Page 1 of 1

To download a full, editable version