Emphasize key events and leaders in Black History while creating an original beat
“I used this large group collaborative project during Black History Month to help teach my preteens and teens about their own history – for example, many of them didn’t know the basics of historical events and leaders. I combined an educational approach (researching basic Black History facts) with beat making in our studio to create an original song that we rehearsed, recorded and performed for the rest of our Club.” – Josh Alfonzo
Read More
How to…
Organize/print age-appropriate historical facts about key individuals, leaders and events to explore during Black History Month – Example resources include:
Turn an iPad into a digital control surface and make beats like a pro
Some participants can be intimidated by the recording studio equipment and process. Empower them by using a tool they are comfortable – iPads and Logic Remote can be used as a control surface to make beats and help participants take control of the recording process. Whether they’re using the transport to record themselves from within the vocal booth, using the iPad as a “second screen” to multitrack mix in the control room, or using the iPad to program drum beats and chord progressions, Logic Remote is a versatile way to make the recording process more accessible to everyone!
Read More
How to…
Download Logic Remote on iTunes App store (this is a Free App)
Launch your Logic Session and pair Logic Remote to your computer (must be on the same network)
FYI: Logic Remote also works with Garageband
Use your iPad as a “second screen” or a “midi” control surface for your session using these helpful features (and more):
Beat making/songwriting:
Drum Pads – digital trigger pads are a tactile way for participants to program in their kick and snare tracks. It also has a “Kits” view which is more visual drum set
Note Repeat – perfect for creating authentic sounding trap music “sprinkler hi hats”
Chord Strips – Similar to “Smart Chords” in Garageband, this is an easy way to write chord progressions. Participant can focus on quickly getting their ideas fleshed out without having to worrying about music theory
Keyboard – copying the root motion of the Smart Chords progression, participants can easily add a bass line or synth layers. It also has “Fretboard” features if you prefer
Navigation and Mixing:
Key Commands – Frequently used recording functions like: Recording Transport, Save, New Track, Automation, etc
Mixer – great way to add a “second screen” that gives participants a tactile way to move digital faders during mixing/mastering
Introducing three random samples equals endless beat making creativity for your participants
Rhythm Roulette is a great way to get participants experimenting with making electronic music by getting over the initial hump that’s always the most challenging… “where do I start?!” Getting a project off the ground is always difficult, but being forced to build around a particular sample or sound can be a great springboard for creativity. There are lots of different ways to use the idea of a “Rhythm Roulette” in the studio, and they can be tailored to different ages and experience levels – below are just a few examples.
In Addition…
This program is based off of the Rhythm Roulette | Mass Appeal Youtube series. To understand how this program works, you have to first understand the rules of the Rhythm Roulette: #1 – Find a record store, #2 – Blind-fold producer, #3 – Pick 3 random records, #4 – Make a beat by sampling
Read More
How to…
The basic concept is… Grab random samples or loops from sound libraries (like Splice or Apple loops) and help participants make a beat using all three samples. FYI: This is a great way to introduce and utilize a Splice Sounds account
For beginners:
Grab a 4 bar instrumental loop (or chord progression)
Each participant (and instructor/s) creates their own drum beat to go with the loop/progression
Don’t let participants listen to each others tracks while they’re making them
Keep the activity short and sweet – have participants only build a 4 bar drum track
Encourage participants to experiment with elements such as: Drum kit libraries, Tempo/BPM, Dynamics, Mute/unmute, Panning, Effects, Layering, Etc.
Everyone plays their track (over a PA speaker), listens and compares what they came up with
Discuss how different grooves and feels can make the same sample sound completely different.
For example: A loop with a 4-on-the-floor feel vs. a trap feel
For more advanced participants:
Choose three random loops and/or samples (Splice or Apple Loops)
Challenge participants to make a beat (in 30-60 minutes) that includes ALL three loops/samples
Introduce more advanced concepts like:
Matching key signatures (Ie. show how some samples won’t work well together because they are in different keys or tonalities)
For teens, before we make any beats, I show them the “I played a show using only the 1991 Casio Rapman” video from Adam Neely’s YouTube channel. This video introduces a topic that is relevant to the activity ie. how limitations can sometimes inspire creativity
Five ways to clean up inappropriate language that you’ll swear by!
It’s natural for participants to want to imitate the music they listen to when they first start out recording or performing. In the context of a youth development music program however, the language and content of these songs aren’t always appropriate. This resource provides several approaches to encourage participants to expand their vocabulary and develop opportunities for growth and maturity including knowing your audience, assigning professional studio roles, rewriting lyrics, “three strikes” rule.
Read More
Example #1 – Know Your Audience
“I talk to my students about knowing your audience and the value you get for being flexible. Most times my rappers just want to swear for shock value and because it’s easier than writing how you feel. I just take the time to have a conversation with them and explain the most versatile artists get more gigs, radio play, opportunities and at the end of the day… more dollars!” – Submitted by Corey DePina, Zumix
Ask participants – “How many cuss words can you think of using when you’re angry?”
Then open www.thesaurus.com and look up and explore the word “Angry”
It might also be helpful to also show participants www.rhymezone.com or other rhyming dictionaries
Help participants understand the limits of using typical cuss words versus other words that may expand their vocabulary, set them apart, and better explain their emotions
Example #2 – Assigning Professional Studio Roles
“Younger participants sit-in on sessions with my older teens who are assigned traditional studio roles to make our studio feel more professional. They’re responsible, trusted and naturally influence younger participants and teach them our rules and if not, I can always step in when there’s inappropriate content. I use this as a teachable moment to have open conversations and help create mindfulness.” –Submitted by Javier Lozada, Malden YMCA
Assign professional Studio Roles
Artist – Typically a vocalist (singer or rapper) recording over a pre-recorded track
Producer – Participants who are interested in using technology to create beats using virtual instruments
Engineer – Participants who are more interested in the “behind the scenes” technical aspect of recording like setting up sessions, microphones, mixing, and using effects
Clearly establish the rules of the studio including language expectations
Help older teen participants mentor younger participants on studio rules and expectations
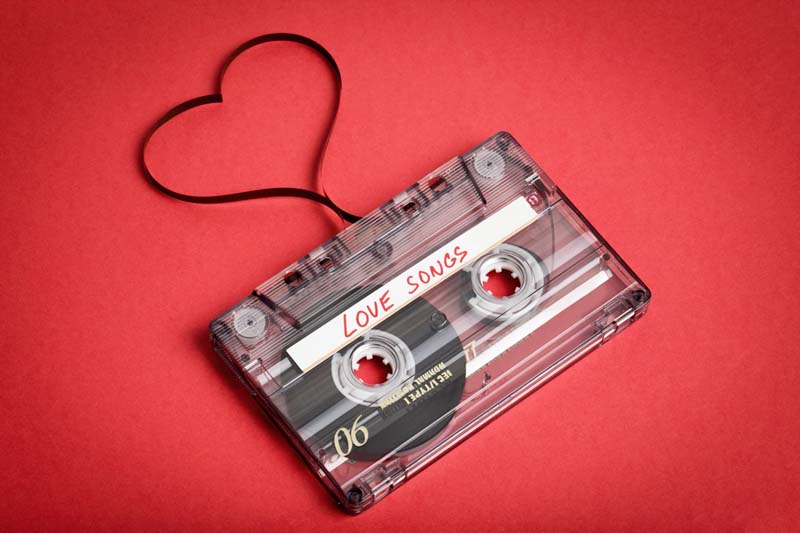
“Love is a Battlefield” – Two teams test their knowledge of commonly used lyrics in love songs!
Music is a universal language and it’s favorite topic is love! This icebreaker activity puts your participants love of music to the test. Which team can identify the most songs that include “Love Lyrics” and which team will leave the game broken-hearted?
Read More
How to…
Decide on the length of the game (ie. first team to “x” number of points or the team with most points after “x” number of minutes/rounds, etc.
Evenly divide a group of participants into two teams or, play off the “love” theme, divide the group into male vs. female.
At the start of each round the staff members pick a “Love Lyric” ie. a specific word that is commonly used in love songs like “Love” or “baby” (see sample list below).
The teams go back and forth and naming songs that include the round’s “Love Lyric”.
Staff members check/google the song’s lyrics to make sure it includes the round’s “Love Lyric”
If a team mistakenly identifies a song that does NOT include the round’s “Love Lyric” then the other team gets a point.
Also, if a team can’t think of a song that includes the round’s “Love Lyric” then the other team gets a point.
Tips and variations:
To keep the game moving quickly, set a time limit of 5 or 10 seconds for each team to think of a song that contains the round’s “Love Lyric”.
Have members sing the lyrics each round
Play love songs in the background while playing the game
“Last one standing” – form a circle, choose a “Love Lyric” and go around the circle naming songs until there is only one person left.
Choose different themes and/or lyrics
Write down songs that you don’t know or add them to a playlist (insight into your members’ musical interests)
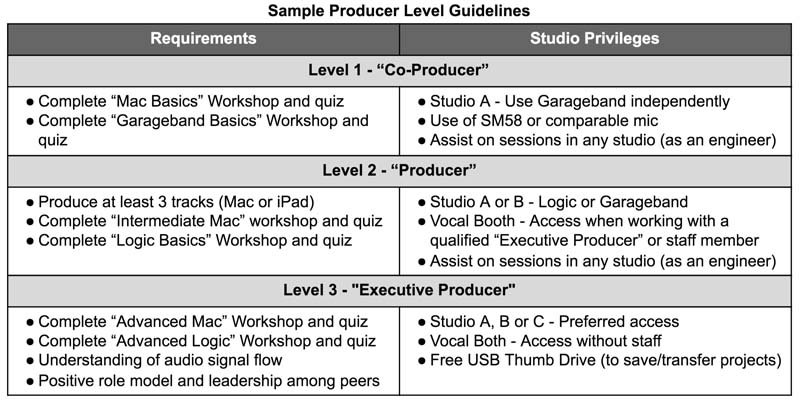
Participants earn studio privileges while improving their production skills!
The Music Producer Incentive System motivates participants to learn more in the studio by creating 3 levels of “Producers”. As participants advance, they learn studio software and techniques and “level-up” to earn additional studio privileges.
How to…
First, set up various levels of Music Production workstations and/or studios in your program space.
For larger Music Studios, this could include various physical studios and/or workstation setups (e.g. Studio A, B, C, etc. in separate rooms)
For smaller Music Studios or single-room studios, consider limiting access to programs, software, and recording equipment (further described below)
All participants start on the most basic setup and “level-up” to more sophisticated studios (or equipment) as they learn more skills. For example:
“Studio A” – iMac or iPad Workstation equipped with Garageband (Headphone based)
“Studio B” – iMac Workstation with Logic and basic interface/mic setup (with speakers) located inside of a practice room
“Studio C” – Professional level project studio, complete with Logic/ProTools, vocal booth, and your program’s most advanced recording studio equipment
Determine what skills participants must demonstrate in order to gain access to each studio. Print and display the requirements for each level of “producer” (Sample levels are provided below)
Create an incentive chart to visually track and help motivate participants’ achievements. Regularly post and update the names of each “Co-Producer”, “Producer” and “Executive Producer”
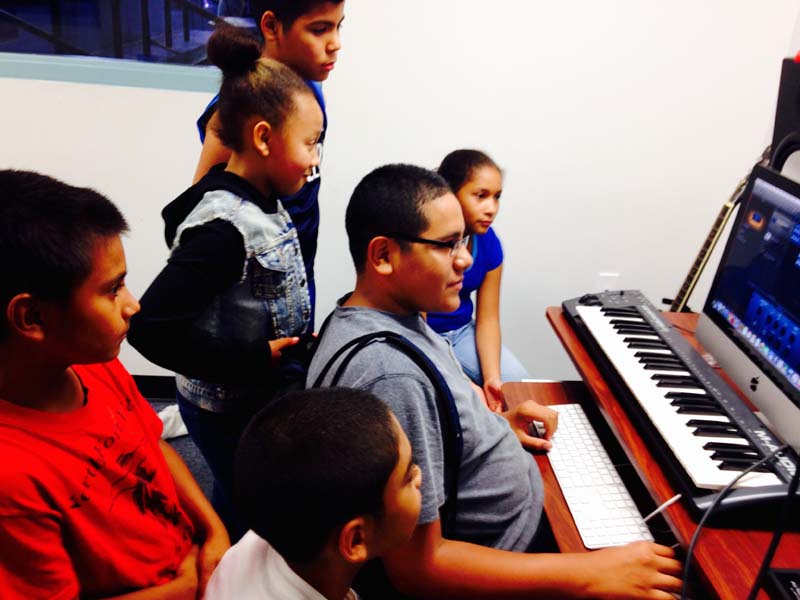
Got a big group for your studio – why not have them all contribute on a track?!
Sometimes you end up with 15 beginner participants in your studio and they all want to make a beat right now! Music Production for Large Groups gives you some tips on how to create a “patchwork quilt” music production project. This allows many different participants with different tastes, preferences, ideas and skills all to contribute to one big tapestry… your final track!
In addition participants:
Learn basic music production and songwriting techniques
Learn collaboration while working towards an end goal
Are inspired to work on solo music production projects
Produce enough tracks to release an album
Read More
How to…
Establish:
End goal/s (i.e. “Album Release” party and/or performance at end of the semester)
Session days and times. Meet with the group on a regular basis.
Participants who are interested in contributing (include as many as possible)
Themes or topics, decided upon as a group and influenced by the music mentors/staff
Participants collaboratively produce style/genre, samples, sounds, and beats
Break down the beat into smaller sections or individual elements for participants to perform/record
For example, to produce the drum track:
Participant “A” performs bass drum pattern on trigger pad
Participant “B” performs snare drum pattern
Participant “C” performs hi-hat pattern
Participant “D, E and F” record claps on 2 & 4
Etc…
Repeat this process for bass and chords
Participants layer single notes on guitar, bass, and/or piano
Involve different participants for each Verse, Chorus, and Bridge. Mentors continually keep the momentum going.
Add lyrics once beat is finalized
Download a rhyming dictionary App on iPads
Each participant writes lyrics to contribute to the project (i.e. 1 or 2 bars worth of lyrics)
Each participant performs their lyrics in the isolation booth right away. This gets them hooked, motivated, and involved.
Mix and finalize the track
Participants who don’t want to sing/perform can help with the final mix by editing and adding effects.
Participants can also get involved in creating album art, photo/video, etc., to help support the album’s creation.
Repeat this process until participants have produced several tracks
Rehearse and prepare for an album release party, and have all participants perform their original songs
Give participants a true “indie-label” experience by helping an up-and-coming artist complete an original album
Help guide an independent, solo artist through all aspects of a music production including songwriting, lyric writing, production, engineering, performance, and marketing/promoting their brand. These projects give independent and self-directed participants the freedom to produce an original album while having support from staff members along the way.
Read More
How to…
Create an invite only in-house “record label” for dedicated participants
Solo artists are invited to be part of “record label”
Meet with Solo Artist to discuss their project timeframes, goals and outcomes
Artist is responsible for all songwriting, lyrics, production, content, ideas, artwork, etc.
Coach the artist on production process, needs, and goal setting
Recording sessions should be booked in advance and as needed
Support, support, support! And keep Solo Artist on task
Help troubleshoot with music industry questions like:
Publishing album online
Marketing/promotion on social media
Booking performances
Etc.
Record a “commercially ready” original album and post for sale (iTunes, etc)
Help artist book performance and market their album to friends, family and supporters
Three proven ways to get participants engaged in songwriting right away
Songwriting and especially lyric writing can be a daunting experience especially if a participant has never done it before. The three examples below get participants writing original songs as quickly as possible using techniques used by professional songwriters. Participants will learn basic songwriting/lyric writing skills and techniques and work as a team to create original songs/lyrics and record/perform their own original songs!
Read More
How to…
A “blank canvas” can be intimidating for even the most experienced artist. The following examples have built-in “creative limitations” to help keep participants focused on completing the task at hand and sets them up for success. Keep your participants accountable to work within the boundaries of the writing activity or songwriting technique and watch how it helps drive participants’ creativity.
Here are 3 examples of successful songwriting activities:
Example 1: “Just write” – Encourage participants to explore stream-of-consciousness lyric writing.
Pick any topic (really ANY topic… e.g. “water bottle” was used once and worked great!)
For 5-10 minutes, participants write in a notebook (or on their phones) without stopping.
Encourage participants to go back through their notes and look for lines or words that jump out.
Help them look for metaphors or build a story behind the theme they chose.
Participants can then rewrite or continue to develop lyrics into a full song.
Example 2: “Scaffolding” – Create an original song using the song form and chord changes of another song.
Participants choose a song they like and are familiar with and analyze the song form and chords.
Participants choose a new theme/topic and write new lyrics to the verse, chorus, bridge, etc.
Participants then take their new lyrics and rewrite the melody of the song.
Optional: You can also choose a new chord progression, key, tempo, and/or whatever works
Record and/or perform!
Example 3: “Changing Perspective” – This activity places a participant/s in their peer’s shoes, encouraging empathy and shift in perspective and voice.
Divide participants into pairs.
Participants share a “small moment” experience from their day.
Optional: Pairs can pick a topic or theme so their lyrics are similar.
Loop a beat or chord progression (whatever feels right for the group).
Each individual writes lyrics about their partner’s experience (in first person).
Participants then add or change tempo/beat/melodies to adjust to the mood.
Participants can then rewrite or continue to develop lyrics into a full song.
Help participants develop their ear and the critical listening skills that are nearly impossible to notate
Critical listening skills like tone, intonation, and groove are universal and highly sought after by all musicians. These skills are also often overlooked or taken for granted in favor of traditional music education skills like music theory and reading skills. Help your participants become well rounded musicians by developing their ear, overall critical listening skills in their playing or music productions. Below are a few ideas on how to help your participants accurately identify and communicate music elements and use them in their own playing or songwriting.
Read More
How to…
Be creative in how you communicate musical skills in instrument workshops, ensembles and/or music productions.
Some ideas for Big Ears workshops include (but not limited to):
Music Theory:
Find the Note: Play a note on piano and have other instrumentalists match the pitch on their instrument
Intervals: Give starting notes and find second note based on reference of sound. Limit options to Major, Minor 3rd, etc.
Identify Chords: Determine whether chords in root position are minor or major. Move chords around but don’t invert. Make it easy at first and build from there.
Transcribe: Figure out a guitar line/chords by ear.
Music Production/Engineering:
Listen as a Producer: Describe instrumentation and explain arrangement. How many hooks? Any interludes? Etc.
Mixing: Working through a mix and talking through the different instruments and how we handle certain frequency ranges
Physics of Sound: How does sound travel? What are frequencies, how are they measured, and what are the frequency ranges instruments play in?
Songwriting:
Rhyme Schemes: What type of rhyme schemes is the artist using? Slant rhymes, or perfect rhymes?
Lyrical Imagery: Is the artist using metaphor, simile, alliteration? What does it make you feel or visualize?
Performance: What type of emotion is the artist using on the track? How does it support the lyrics?