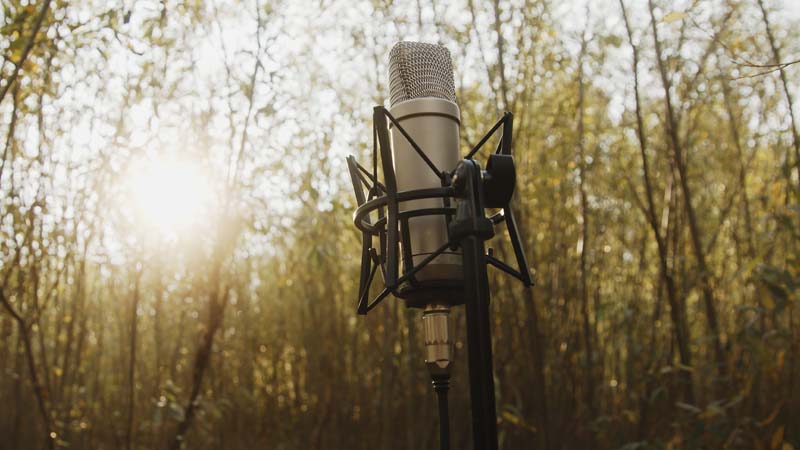
Send participants on a soundscape scavenger hunt – creating unique beats using field recordings from their surroundings
Music is everywhere and the sounds in the world around us can inspire an original beat or song. Found Sound Sampling Projects can get participants to critically listen to their surroundings and use those sounds to create music that is unique as they are. These projects also empower participants to utilize the technology they bring with them everyday in innovative ways as an alternative to traditional instruments.
Read More
How to…
Equipment needed:
Smartphone or tablet
Note: Recording in stereo is essential for capturing ambience – Starting in iOS 14 and iPadOS 14, you can now capture stereo audio using the built-in microphones on supported devices
Plan your Found Sound scavenger hunt – Send participants to explore sounds in various settings like:
In your building
Outside or in nature (take a field trip!)
At home or at school
Around town or in the city
Encourage them to go to a location and sit in silence and just listen to their surroundings or experiment by interacting with everyday objects in uncommon ways
Discuss and explore different environments and textures and how those sounds will influence the beat and those creating it. For example:
Sounds from nature vs. sounds of the city
Sounds from machinery vs. organic sounds
Sounds made using your body (e.g. stomps, claps, sound effects, etc) vs. sounds from an object
Sounds from everyday objects that played like instruments (e.g. touched, plucked, struck, etc)
Consider a found sound checklist – e.g. collect sounds that sound like:
Drums e.g. Kick, hi-hats, snare, toms, cymbals, shakers, etc.
Pitched samples e.g. taping on a glass or blowing into a soda bottle
Vocal samples e.g. people talking in a room or someone shouting outside, etc.
Risers e.g. doppler effect of a car or train passing by, etc.
Bass drops e.g. sound of an elevator or engine
“Seasoning” e.g. anything out of the ordinary or unique
Load samples into Sampler apps and start creating
Encourage participants to use their creativity to come up with unique sounds
Experiment with effects to manipulate the sound (e.g. EQ, reverb, chorus, gates, transposition, panning, reverse effects, pitch correction, distortion, chopping samples, etc.)
Finalize the project with ideas like:
Create a custom drum kit or sample pack and share among youth participants
Write lyrics that fit the mood that inspired the beat
Share your participants’ creations!
Optional project:
Consider starting with a premade beat (especially for younger or beginner participants)
Ask them to find samples that sound like the following:
Kick Drum
Snare Drum
Hi-Hat
Percussion
Etc.
Replace the samples and play the altered beat
Tweak the mix, effects or record new samples until participants like the sound
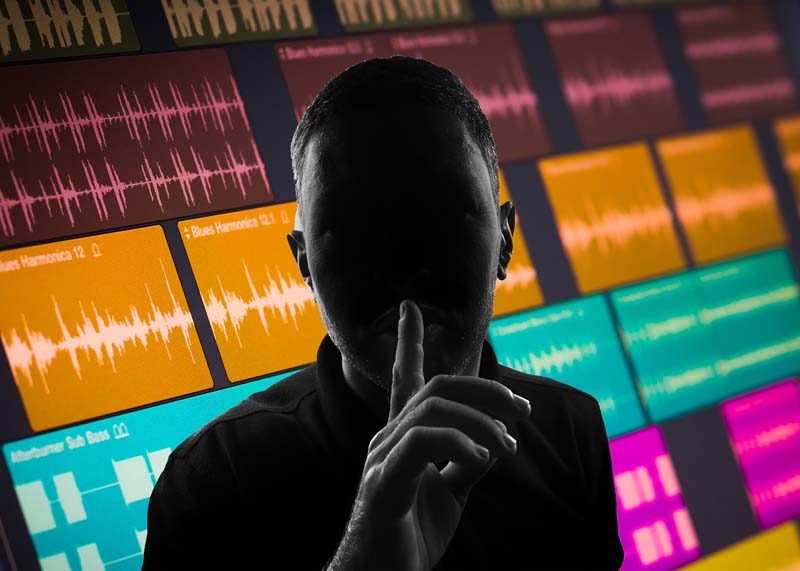
You’ve heard of the “Masked Singer”… now try the “Masked” Producer!
Social distancing has limited the number of participants that can be served at any given time, which is especially challenging in the studio or smaller isolation booth spaces. So, how do you encourage music production collaborations when you can only have one youth participant in the studio at a time? Use these limitations to your advantage and encourage youth to make beats with an element of mystery.
In addition..
Projects can be done in either virtual, in-person or hybrid programming models. For Virtual programming – use a collaborative browser-based DAW like Soundtrap
NOTE: Disinfect production workstations and equipment between each use (if applicable)
Set up 3 (or more) Music Production stations in your music program space or multiple rooms
Can be as simple as an iPad and headphones or more complex production workstation
Can be adapted for time, done over multiple days or send files virtually – the key is keeping identity of each participant a secret until the end
Here is an hour-long Mystery Musical (production) Chairs session example:
15 minutes – Assign participants to start a new project (e.g. create a 4-8 bar loop)
15 minutes – Participants rotate to another workstation and must add or build off of what the previous participant has already created
15 minutes – Participants rotate again to another workstation (same as previous step)
15 minutes – Final tracks are played – youth reveal what they contributed to each track
Covert Chords– Multiple participants
Assign all participants to create a beat using the same Keys/synth/guitar/bass loop
Loops can be original, Splice, Garageband, etc.
Determine a timeframe for the project (e.g. 1 hour, 1 day, 1 week, etc) depending on skill level
Participants work on their beats individually and come together for a final listening session
Compare and contrast how each participant interpreted the loop
Ghost Writing – Multiple participants
Decide on a theme for the song/project (e.g. Social Justice, Video Games, etc) – Be creative!
Play a stock beat or loop over speakers (or in Zoom)
Everyone writes 4-8 bars of lyrics based on the theme
One at a time, participants sing/rap/record their lyrics in the studio, but the previous participant’s performance is muted
Play the final mashed-up song for all participants at the end
Production Pen Pals – Two participants
Pair two producers or musical artists together but keep their identities a secret
Determine a production schedule of when each participant will come to the studio (or work virtually) on a track. Also set time limits on how long each participant can spend working on the project. For example:
Participant #1 – Monday and Wednesday 3-4pm
Participant #2 – Tuesday and Thursday 3-4pm
Participant #1 and #2 – Final listening session on Friday 3-4pm
The first participant starts a beat in the studio (or virtually) and each participant take turns adding/subtracting to the beat in isolation and saving any vocal productions for last
On the final day the duo is brought together (socially distanced) to reveal their identities and listen to the final production
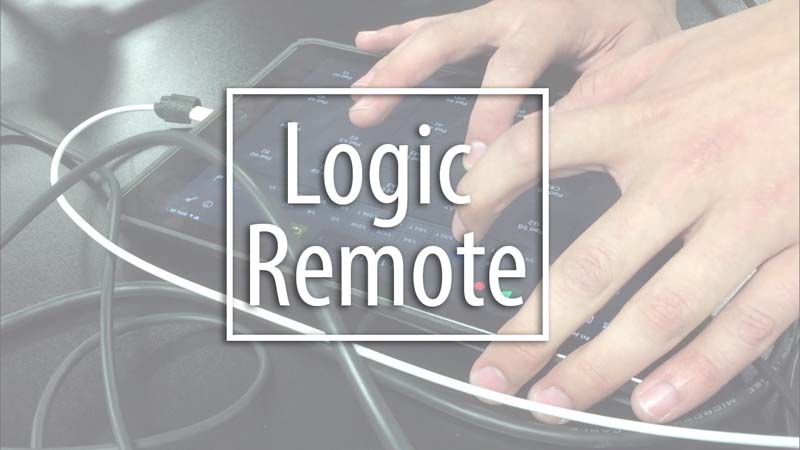
Turn an iPad into a digital control surface and make beats like a pro
Some participants can be intimidated by the recording studio equipment and process. Empower them by using a tool they are comfortable – iPads and Logic Remote can be used as a control surface to make beats and help participants take control of the recording process. Whether they’re using the transport to record themselves from within the vocal booth, using the iPad as a “second screen” to multitrack mix in the control room, or using the iPad to program drum beats and chord progressions, Logic Remote is a versatile way to make the recording process more accessible to everyone!
Read More
How to…
Download Logic Remote on iTunes App store (this is a Free App)
Launch your Logic Session and pair Logic Remote to your computer (must be on the same network)
FYI: Logic Remote also works with Garageband
Use your iPad as a “second screen” or a “midi” control surface for your session using these helpful features (and more):
Beat making/songwriting:
Drum Pads – digital trigger pads are a tactile way for participants to program in their kick and snare tracks. It also has a “Kits” view which is more visual drum set
Note Repeat – perfect for creating authentic sounding trap music “sprinkler hi hats”
Chord Strips – Similar to “Smart Chords” in Garageband, this is an easy way to write chord progressions. Participant can focus on quickly getting their ideas fleshed out without having to worrying about music theory
Keyboard – copying the root motion of the Smart Chords progression, participants can easily add a bass line or synth layers. It also has “Fretboard” features if you prefer
Navigation and Mixing:
Key Commands – Frequently used recording functions like: Recording Transport, Save, New Track, Automation, etc
Mixer – great way to add a “second screen” that gives participants a tactile way to move digital faders during mixing/mastering
Introducing three random samples equals endless beat making creativity for your participants
Rhythm Roulette is a great way to get participants experimenting with making electronic music by getting over the initial hump that’s always the most challenging… “where do I start?!” Getting a project off the ground is always difficult, but being forced to build around a particular sample or sound can be a great springboard for creativity. There are lots of different ways to use the idea of a “Rhythm Roulette” in the studio, and they can be tailored to different ages and experience levels – below are just a few examples.
In Addition…
This program is based off of the Rhythm Roulette | Mass Appeal Youtube series. To understand how this program works, you have to first understand the rules of the Rhythm Roulette: #1 – Find a record store, #2 – Blind-fold producer, #3 – Pick 3 random records, #4 – Make a beat by sampling
Read More
How to…
The basic concept is… Grab random samples or loops from sound libraries (like Splice or Apple loops) and help participants make a beat using all three samples. FYI: This is a great way to introduce and utilize a Splice Sounds account
For beginners:
Grab a 4 bar instrumental loop (or chord progression)
Each participant (and instructor/s) creates their own drum beat to go with the loop/progression
Don’t let participants listen to each others tracks while they’re making them
Keep the activity short and sweet – have participants only build a 4 bar drum track
Encourage participants to experiment with elements such as: Drum kit libraries, Tempo/BPM, Dynamics, Mute/unmute, Panning, Effects, Layering, Etc.
Everyone plays their track (over a PA speaker), listens and compares what they came up with
Discuss how different grooves and feels can make the same sample sound completely different.
For example: A loop with a 4-on-the-floor feel vs. a trap feel
For more advanced participants:
Choose three random loops and/or samples (Splice or Apple Loops)
Challenge participants to make a beat (in 30-60 minutes) that includes ALL three loops/samples
Introduce more advanced concepts like:
Matching key signatures (Ie. show how some samples won’t work well together because they are in different keys or tonalities)
For teens, before we make any beats, I show them the “I played a show using only the 1991 Casio Rapman” video from Adam Neely’s YouTube channel. This video introduces a topic that is relevant to the activity ie. how limitations can sometimes inspire creativity
If you haven’t checked out any Genius Deconstructed videos yet – get on it! “The Making of Thank U, Next” is great to share with kids and helps us remember that making music is really about having fun and sharing an emotional connection with friends, artists, and fans!
Stay up to date with the latest music trends. Below is Genius’ Deconstructed series YouTube Playlist
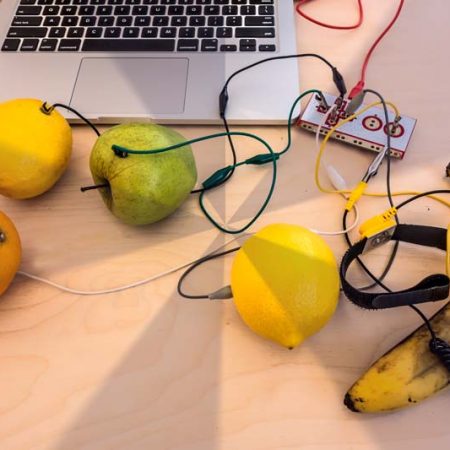
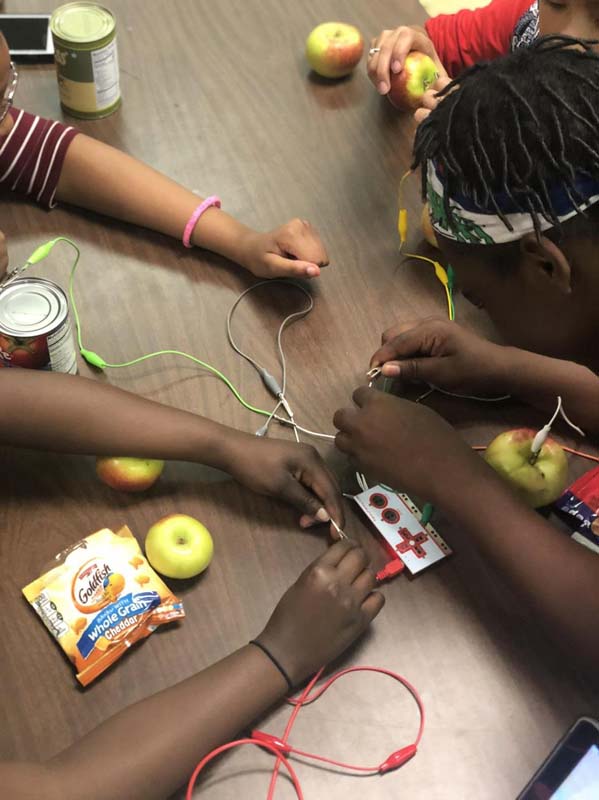
Turn apples, bananas, and muffins into drum triggers – Submitted by Javier Lozada www.ymcamalden.org
Looking for a new way to engage young participants?
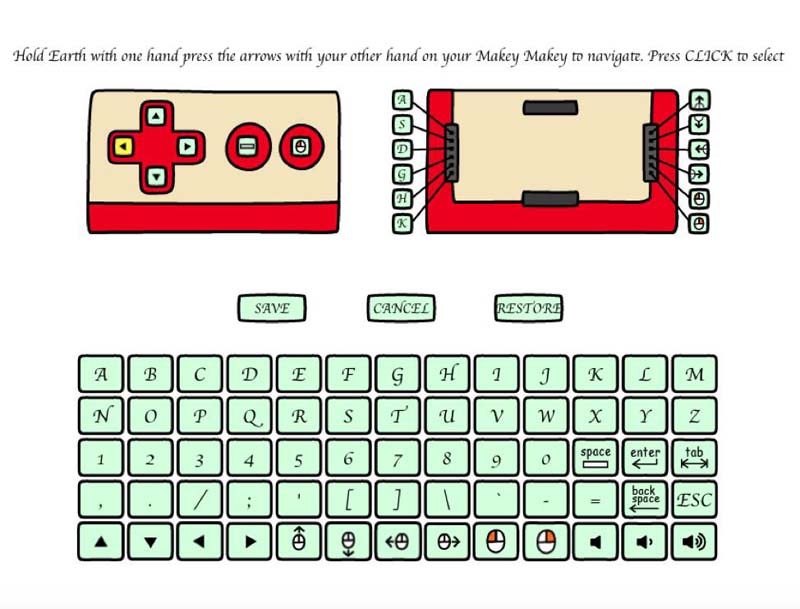
Here at the Everett Studio Clubhouse, we use the Makey Makey as a way to introduce young participants into thinking about rhythm and grooves without being intimidated by the interface provided by the usual midi controller + DAW. In a sense, it provides a distraction from the pressure they may feel to “get it right” in the first try. We like to redefine lunch table beats and the use of Apple products by setting up the Makey Makey kit during their lunchtime and use the food items they are currently eating as pieces of a drum kit. The aesthetic of the kit is what usually draws young participants in to participate even if they have never shown interest in the music program. This also helps them develop 21st-century skills when they have to use logic and their knowledge in science to figure out what items could be conducive or how to wire the Makey Makes in a way that makes sense!
Items required:
Computer
Makey Makey Kit ($50)
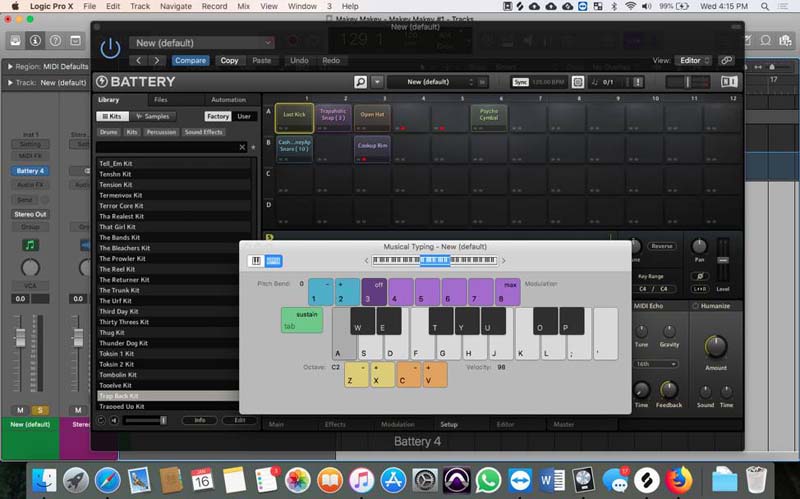
The Makey Makey kit comes with proprietary software which lets you use it as a virtual instrument but here we like to use NI Battery or any other software samplers in order to be able to use custom samples which are more relatable and appropriate for the genres they are used to.
Warning: High Schoolers may love it too
Update: Using a Makey Makey kit + Logic’s musical typing I was able to pair it up with a sampler and use custom samples
Each participant creates their REMIX version of the song of the week – then pick a winner!
Use the isolated stems and samples from popular artists to unleash your participant’s creativity. At the start of each week provide your participants a Remix template file (in Logic or Ableton) preloaded with with the hook of a popular song. Throughout the week participants work on creating their unique version of the song by adding their own drum beat, chords, bass lines and custom mix. At the end of the week, host a voting session on Friday to determine the winner.
Read More
How to…
The Remix Contest takes some weekly preparation from music program staff:
Select the “Remix Song of the Week” (e.g. a popular Top 40 Song)
Search for a popular song with an isolated vocal track
Tip – have participants create a playlist of songs they’d like to remix
Create a Remix Template to be used by all participants
Trim to only include about 30 sec (e.g. bridge and final chorus)
Edit for beat-matching using the metronome
Program/sequence basic chords or significant lead/bass lines
Each participant or groups of participants starts the week’s contest with the same Remix Template
Throughout the week/s:
Participants work in groups or on their own
Participants create their own original drum beat including:
Choose kit sound/s
Snare, kick, and hi-hat patterns
Help participants experiment by adjusting the patterns around
Help participants experiment with other sounds, percussion and effects
Participants can also edit the basic template chords and bass lines that were pre-programmed
Adjust sound libraries and instruments
Add parts/harmonies
Adjust to fit their customized drum pattern
Add effects, plugins, and adjust mix
Voting session: Host a listening and “Voting Session” at the end of the week
Anonymously play each 30 second Remix
After all remixes are played, participants vote by raise of hands
Announce and recognize the winner!
Highlight/showcase weekly winner on a bulletin board
Optional end of session “Remix Champion” event
Weekly Remix Contest winners go head to head at the end of the semester to crown the ultimate “Remix Champion” (complete with trophy/prize
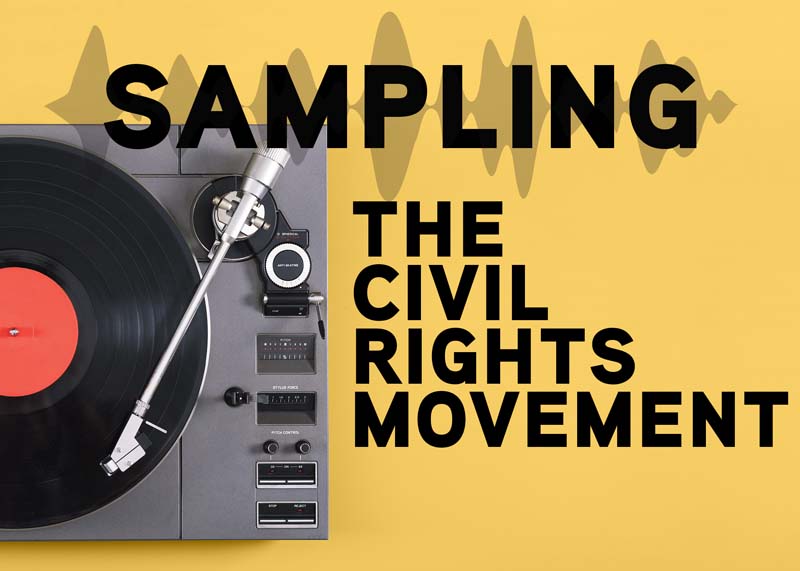
Expose participants to sampling through culturally and historically significant music
Part music history workshop and part sampling workshop – Participants learn about and discuss the cultural/historical significance of each song used while learning how to produce and perform an original song using samples. Teach your participants basic sampling skills, expose them to new styles/genres of music and help them build a foundation and appreciation for where modern music gets its roots.
Read More
How To…
Explore music samples using WhoSampled website or App
Import the tracks into a Studio Computer or iPad
Use interesting samples to build an original beat
Encourage participants to create their own original lyrics that complement the spirit of the song
Post finished tracks to social media websites or host a showcase event
Song Ideas:
“I Wish I Knew (How It Would Feel to Be Free)” – by Nina Simone
“Selma March” – by Grant Green
“We Shall Overcome” – by Larry Goldings
“Alabama” by John Coltrane
“Change Gonna Come” by Sam Cooke
“Lift Every Voice And Sing” – by Hank Crawford and Jimmy McGriff