“Found Sound” Sampling Project

Send participants on a soundscape scavenger hunt – creating unique beats using field recordings from their surroundings

Music is everywhere and the sounds in the world around us can inspire an original beat or song. Found Sound Sampling Projects can get participants to critically listen to their surroundings and use those sounds to create music that is unique as they are. These projects also empower participants to utilize the technology they bring with them everyday in innovative ways as an alternative to traditional instruments. 

Read More

How to… 

  • Equipment needed: 
  • Recommended Sampling Apps: 
  • Plan your Found Sound scavenger hunt – Send participants to explore sounds in various settings like:  
    • In your building 
    • Outside or in nature (take a field trip!) 
    • At home or at school 
    • Around town or in the city 
  • Encourage them to go to a location and sit in silence and just listen to their surroundings or experiment by interacting with everyday objects in uncommon ways
  • Discuss and explore different environments and textures and how those sounds will influence the beat and those creating it. For example: 
    • Sounds from nature vs. sounds of the city 
    • Sounds from machinery vs. organic sounds 
    • Sounds made using your body (e.g. stomps, claps, sound effects, etc) vs. sounds from an object 
    • Sounds from everyday objects that played like instruments (e.g. touched, plucked, struck, etc)
  • Consider a found sound checklist – e.g. collect sounds that sound like: 
    • Drums e.g. Kick, hi-hats, snare, toms, cymbals, shakers, etc.
    • Pitched samples e.g. taping on a glass or blowing into a soda bottle
    • Vocal samples e.g. people talking in a room or someone shouting outside, etc.
    • Risers e.g. doppler effect of a car or train passing by, etc.
    • Bass drops e.g. sound of an elevator or engine
    • “Seasoning” e.g. anything out of the ordinary or unique 
  • Load samples into Sampler apps and start creating 
    • Encourage participants to use their creativity to come up with unique sounds
    • Experiment with effects to manipulate the sound (e.g. EQ, reverb, chorus, gates, transposition, panning, reverse effects, pitch correction, distortion, chopping samples, etc.) 
  • Finalize the project with ideas like: 
    • Create a custom drum kit or sample pack and share among youth participants 
    • Write lyrics that fit the mood that inspired the beat
    • Share your participants’ creations! 
  • Optional project: 
    • Consider starting with a premade beat (especially for younger or beginner participants) 
      • Ask them to find samples that sound like the following: 
      • Kick Drum
      • Snare Drum
      • Hi-Hat
      • Percussion
      • Etc. 
    • Replace the samples and play the altered beat 
    • Tweak the mix, effects or record new samples until participants like the sound

To download a full, editable version

Creating a Black History Month Song/Project

Emphasize key events and leaders in Black History while creating an original beat

“I used this large group collaborative project during Black History Month to help teach my preteens and teens about their own history – for example, many of them didn’t know the basics of historical events and leaders.  I combined an educational approach (researching basic Black History facts) with beat making in our studio to create an original song that we rehearsed, recorded and performed for the rest of our Club.” – Josh Alfonzo

Read More

How to… 

  • Organize/print age-appropriate historical facts about key individuals, leaders and events to explore during Black History Month – Example resources include: 
    • www.history.com/topics/black-history
    • www.africanamericanhistorymonth.gov/
    • www.kids.nationalgeographic.com/explore/history/black-history-month/
  • Participants (groups or individuals) choose or are assigned a Black History fact/s
  • Help each participant create original lyrics/verses using the facts provided 
    • For example, a participant selects or is assigned fact/s about Dr. Martin Luther King
    • They then research more about his life, accomplishments and significance
    • Each participant then creates/writes original lyrics (e.g. 2 to 4 bar phrase) 
  • Create a collaborative beat – Encourage participants to provide feedback on the beat including: 
    • Style, tempo, vibe, and overall sound
    • Let participants “vote” on sample sounds, beat/patterns, chord progression, bass lines, melodies, etc.
  • Once the beat/track is created play the beat on a loop 
    • Collaboratively write a “hook” for the track 
    • Help participants rehearse their verses (e.g. work on edits, flow, etc) 
    • Record each verse and hook
  • Edit and finalize the track 
  • Showcase
    • Post to social media 
    • Shoot a Music Video and share
    • Perform live on stage 

To download a full, editable version

4 “Masked” Music Production Ideas

You’ve heard of the “Masked Singer”… now try the “Masked” Producer!

Social distancing has limited the number of participants that can be served at any given time, which is especially challenging in the studio or smaller isolation booth spaces. So, how do you encourage music production collaborations when you can only have one youth participant in the studio at a time? Use these limitations to your advantage and encourage youth to make beats with an element of mystery.

In addition.. 

  • Projects can be done in either virtual, in-person or hybrid programming models. For Virtual programming – use a collaborative browser-based DAW like Soundtrap 
  • NOTE: Disinfect production workstations and equipment between each use (if applicable) 

Read More

How to… 

  • Mystery Musical (production) Chairs – Multiple participants
    • Set up 3 (or more) Music Production stations in your music program space or multiple rooms
      • Can be as simple as an iPad and headphones or more complex production workstation 
    • Can be adapted for time, done over multiple days or send files virtually – the key is keeping identity of each participant a secret until the end
    • Here is an hour-long Mystery Musical (production) Chairs session example: 
      • 15 minutes – Assign participants to start a new project (e.g. create a 4-8 bar loop) 
      • 15 minutes – Participants rotate to another workstation and must add or build off of what the previous participant has already created
      • 15 minutes – Participants rotate again to another workstation (same as previous step) 
      • 15 minutes – Final tracks are played – youth reveal what they contributed to each track 
  • Covert Chords – Multiple participants
    • Assign all participants to create a beat using the same Keys/synth/guitar/bass loop
    • Loops can be original, Splice, Garageband, etc.
    • Determine a timeframe for the project (e.g. 1 hour, 1 day, 1 week, etc) depending on skill level 
    • Participants work on their beats individually and come together for a final listening session 
    • Compare and contrast how each participant interpreted the loop 
  • Ghost Writing – Multiple participants
    • Decide on a theme for the song/project (e.g. Social Justice, Video Games, etc) – Be creative! 
    • Play a stock beat or loop over speakers (or in Zoom) 
    • Everyone writes 4-8 bars of lyrics based on the theme
    • One at a time, participants sing/rap/record their lyrics in the studio, but the previous participant’s performance is muted 
    • Play the final mashed-up song for all participants at the end
  • Production Pen Pals – Two participants
    • Pair two producers or musical artists together but keep their identities a secret 
    • Determine a production schedule of when each participant will come to the studio (or work virtually) on a track. Also set time limits on how long each participant can spend working on the project. For example: 
      • Participant #1 – Monday and Wednesday 3-4pm
      • Participant #2 – Tuesday and Thursday 3-4pm 
      • Participant #1 and #2 – Final listening session on Friday 3-4pm 
    • The first participant starts a beat in the studio (or virtually) and each participant take turns adding/subtracting to the beat in isolation and saving any vocal productions for last 
    • On the final day the duo is brought together (socially distanced) to reveal their identities and listen to the final production 
Page 1 of 1

To download a full, editable version

Explore similar resources in Resources for Virtual Music Programming or Music Production

Logic Remote as a Midi Control Surface

Turn an iPad into a digital control surface and make beats like a pro

Some participants can be intimidated by the recording studio equipment and process.  Empower them by using a tool they are comfortable – iPads and Logic Remote can be used as a control surface to make beats and help participants take control of the recording process.  Whether they’re using the transport to record themselves from within the vocal booth, using the iPad as a “second screen” to multitrack mix in the control room, or using the iPad to program drum beats and chord progressions, Logic Remote is a versatile way to make the recording process more accessible to everyone!

Read More

How to… 

  • Download Logic Remote on iTunes App store (this is a Free App) 
  • Launch your Logic Session and pair Logic Remote to your computer (must be on the same network) 
    • FYI: Logic Remote also works with Garageband 
  • Use your iPad as a “second screen” or a “midi” control surface for your session using these helpful features (and more): 
    • Beat making/songwriting: 
      • Drum Pads – digital trigger pads are a tactile way for participants to program in their kick and snare tracks. It also has a “Kits” view which is more visual drum set
      • Note Repeat – perfect for creating authentic sounding trap music “sprinkler hi hats”
      • Chord Strips – Similar to “Smart Chords” in Garageband, this is an easy way to write chord progressions.  Participant can focus on quickly getting their ideas fleshed out without having to worrying about music theory 
      • Keyboard – copying the root motion of the Smart Chords progression, participants can easily add a bass line or synth layers. It also has “Fretboard” features if you prefer
    • Navigation and Mixing:
      • Key Commands – Frequently used recording functions like: Recording Transport, Save, New Track, Automation, etc
      • Mixer – great way to add a “second screen” that gives participants a tactile way to move digital faders during mixing/mastering
Page 1 of 1

To download a full, editable version

Explore similar resources in Music Production

Rhythm Roulette (Using Splice)

Introducing three random samples equals endless beat making creativity for your participants

Rhythm Roulette is a great way to get participants experimenting with making electronic music by getting over the initial hump that’s always the most challenging… “where do I start?!” Getting a project off the ground is always difficult, but being forced to build around a particular sample or sound can be a great springboard for creativity. There are lots of different ways to use the idea of a “Rhythm Roulette” in the studio, and they can be tailored to different ages and experience levels – below are just a few examples.  

In Addition… 

  • This program is based off of the Rhythm Roulette | Mass Appeal Youtube series. To understand how this program works, you have to first understand the rules of the Rhythm Roulette: #1 – Find a record store, #2 – Blind-fold producer, #3 – Pick 3 random records, #4 – Make a beat by sampling 

Read More

How to… 

  • The basic concept is… Grab random samples or loops from sound libraries (like Splice or Apple loops) and help participants make a beat using all three samples. FYI: This is a great way to introduce and utilize a Splice Sounds account
  • For beginners: 
    • Grab a 4 bar instrumental loop (or chord progression) 
    • Each participant (and instructor/s) creates their own drum beat to go with the loop/progression 
      • Don’t let participants listen to each others tracks while they’re making them
      • Keep the activity short and sweet – have participants only build a 4 bar drum track
      • Encourage participants to experiment with elements such as: Drum kit libraries, Tempo/BPM, Dynamics, Mute/unmute, Panning, Effects, Layering, Etc. 
    • Everyone plays their track (over a PA speaker), listens and compares what they came up with
    • Discuss how different grooves and feels can make the same sample sound completely different.
      • For example: A loop with a 4-on-the-floor feel vs. a trap feel
  • For more advanced participants: 
    • Choose three random loops and/or samples (Splice or Apple Loops) 
    • Challenge participants to make a beat (in 30-60 minutes) that includes ALL three loops/samples
    • Introduce more advanced concepts like: 
      • Matching key signatures (Ie. show how some samples won’t work well together because they are in different keys or tonalities)
      • Tempo and beat matching 
      • Groove and feel (ie. Swing vs. straight) 
      • Dynamics
      • Effects and filters 
      • Classic drum sounds (ie. Acoustic, electronic, 808’s, lo-fi, etc) 
      • Etc. 
  • Variation for teens: 
    • For teens, before we make any beats, I show them the “I played a show using only the 1991 Casio Rapman” video from Adam Neely’s YouTube channel. This video introduces a topic that is relevant to the activity ie. how limitations can sometimes inspire creativity
Page 1 of 1

To download a full, editable version

Practical Tips on How to Address Inappropriate Language

Five ways to clean up inappropriate language that you’ll swear by!

It’s natural for participants to want to imitate the music they listen to when they first start out recording or performing. In the context of a youth development music program however, the language and content of these songs aren’t always appropriate.  This resource provides several approaches to encourage participants to expand their vocabulary and develop opportunities for growth and maturity including knowing your audience, assigning professional studio roles, rewriting lyrics, “three strikes” rule.  

Read More

Example #1 – Know Your Audience

“I talk to my students about knowing your audience and the value you get for being flexible. Most times my rappers just want to swear for shock value and because it’s easier than writing how you feel. I just take the time to have a conversation with them and explain the most versatile artists get more gigs, radio play, opportunities and at the end of the day… more dollars!” – Submitted by Corey DePina, Zumix
  • Ask participants – “How many cuss words can you think of using when you’re angry?” 
  • Then open www.thesaurus.com and look up and explore the word “Angry” 
  • It might also be helpful to also show participants www.rhymezone.com or other rhyming dictionaries 
  • Help participants understand the limits of using typical cuss words versus other words that may expand their vocabulary, set them apart, and better explain their emotions 

Example #2 – Assigning Professional Studio Roles 

“Younger participants sit-in on sessions with my older teens who are assigned traditional studio roles to make our studio feel more professional. They’re responsible, trusted and naturally influence younger participants and teach them our rules and if not, I can always step in when there’s inappropriate content. I use this as a  teachable moment to have open conversations and help create mindfulness.”   Submitted by Javier Lozada, Malden YMCA
  • Assign professional Studio Roles
    • Artist – Typically a vocalist (singer or rapper) recording over a pre-recorded track 
    • Producer – Participants who are interested in using technology to create beats using virtual instruments
    • Engineer – Participants who are more interested in the “behind the scenes” technical aspect of recording like setting up sessions, microphones, mixing, and using effects
  • Clearly establish the rules of the studio including language expectations 
  • Help older teen participants mentor younger participants on studio rules and expectations 
Page 1 of 3

To download a full, editable version

Music Producer Incentive System

Participants earn studio privileges while improving their production skills! 

The Music Producer Incentive System motivates participants to learn more in the studio by creating 3 levels of “Producers”. As participants advance, they learn studio software and techniques and “level-up” to earn additional studio privileges.

How to…

  • First, set up various levels of Music Production workstations and/or studios in your program space. 
    • For larger Music Studios, this could include various physical studios and/or workstation setups (e.g. Studio A, B, C, etc. in separate rooms) 
    • For smaller Music Studios or single-room studios, consider limiting access to programs, software, and recording equipment (further described below) 
  • All participants start on the most basic setup and “level-up” to more sophisticated studios (or equipment) as they learn more skills. For example: 
    • “Studio A” – iMac or iPad Workstation equipped with Garageband (Headphone based) 
    • “Studio B” – iMac Workstation with Logic and basic interface/mic setup (with speakers) located inside of a practice room
    • “Studio C” – Professional level project studio, complete with Logic/ProTools, vocal booth, and your program’s most advanced recording studio equipment 
  • Determine what skills participants must demonstrate in order to gain access to each studio. Print and display the requirements for each level of “producer” (Sample levels are provided below) 
  • Create an incentive chart to visually track and help motivate participants’ achievements. Regularly post and update the names of each “Co-Producer”, “Producer” and “Executive Producer”

Read More

Page 1 of 3

To download a full, editable version

Explore similar resources in Music Production

New Participant Orientation Tools

Expecting lots of new kids this semester? Set them up for success with these handy tools!

Download the bundle of ALL of the New Participant Orientation Tools

or choose an individual resource

New Participant Orientation Process

New Participant Orientation Process

Help break the ice and welcome new participants so they can make music right away! ...
Establishing House Rules

Establishing House Rules

Set expectations and ensure proper use of the equipment and facilities. Your Music Studio likely ...
Equipment Orientation Worksheets

Equipment Orientation Worksheets

Focus on helping participants MAKE MUSIC right away by conducting short equipment orientations to get ...
Musical Poster Boards

Musical Poster Boards

Large posters you can print and hang in your music room to help remind participants ...

Music Production for Large Groups

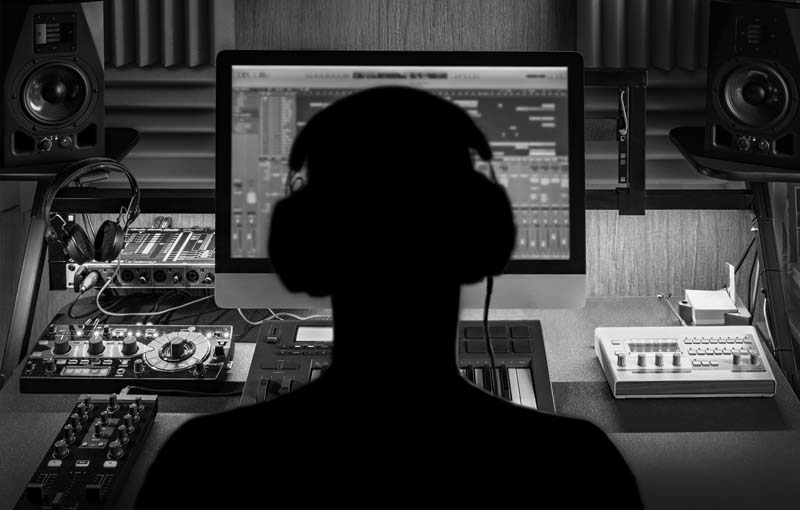
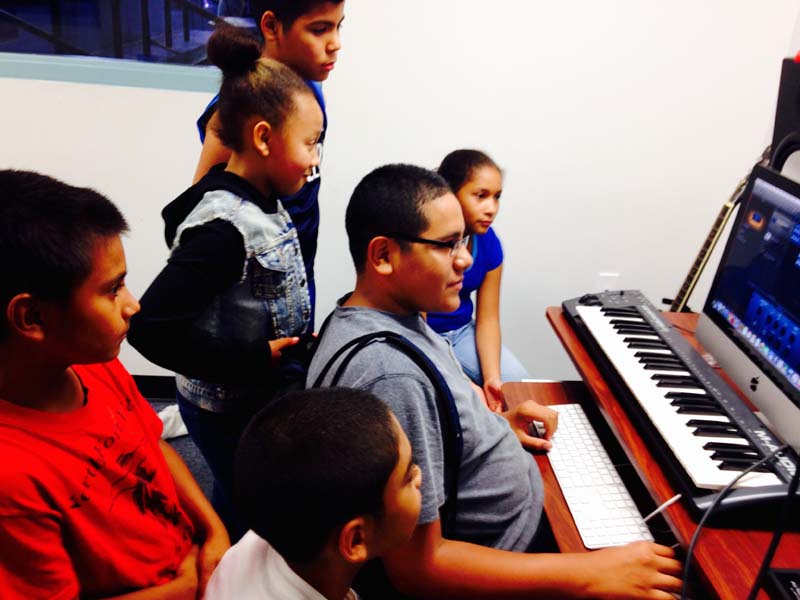
Got a big group for your studio – why not have them all contribute on a track?!

Sometimes you end up with 15 beginner participants in your studio and they all want to make a beat right now! Music Production for Large Groups gives you some tips on how to create a “patchwork quilt” music production project. This allows many different participants with different tastes, preferences, ideas and skills all to contribute to one big tapestry… your final track!  

In addition participants:

  • Learn basic music production and songwriting techniques
  • Learn collaboration while working towards an end goal
  • Are inspired to work on solo music production projects
  • Produce enough tracks to release an album

Read More

How to…

  • Establish:
    • End goal/s (i.e. “Album Release” party and/or performance at end of the semester)
    • Session days and times. Meet with the group on a regular basis.
    • Participants who are interested in contributing (include as many as possible)
    • Themes or topics, decided upon as a group and influenced by the music mentors/staff
  • Participants collaboratively produce style/genre, samples, sounds, and beats
  • Break down the beat into smaller sections or individual elements for participants to perform/record
    • For example, to produce the drum track:
      • Participant “A” performs bass drum pattern on trigger pad
      • Participant “B” performs snare drum pattern
      • Participant “C” performs hi-hat pattern
      • Participant “D, E and F” record claps on 2 & 4
      • Etc…
    • Repeat this process for bass and chords
      • Participants layer single notes on guitar, bass, and/or piano
    • Involve different participants for each Verse, Chorus, and Bridge. Mentors continually keep the momentum going.
  • Add lyrics once beat is finalized
    • Download a rhyming dictionary App on iPads
    • Each participant writes lyrics to contribute to the project (i.e. 1 or 2 bars worth of lyrics)
    • Each participant performs their lyrics in the isolation booth right away. This gets them hooked, motivated, and involved.
  • Mix and finalize the track
    • Participants who don’t want to sing/perform can help with the final mix by editing and adding effects.
    • Participants can also get involved in creating album art, photo/video, etc., to help support the album’s creation.
  • Repeat this process until participants have produced several tracks
  • Rehearse and prepare for an album release party, and have all participants perform their original songs
Page 1 of 1 (full text available in download)
To download a full, editable version

Explore similar resources in Music Production 

Solo Artist Music Production Projects

Give participants a true “indie-label” experience by helping an up-and-coming artist complete an original album

Help guide an independent, solo artist through all aspects of a music production including songwriting, lyric writing, production, engineering, performance, and marketing/promoting their brand. These projects give independent and self-directed participants the freedom to produce an original album while having support from staff members along the way. 

Read More

How to…

  • Create an invite only in-house “record label” for dedicated participants 
    • Solo artists are invited to be part of “record label” 
  • Meet with Solo Artist to discuss their project timeframes, goals and outcomes 
  • Artist is responsible for all songwriting, lyrics, production, content, ideas, artwork, etc.
    • Coach the artist on production process, needs, and goal setting
  • Recording sessions should be booked in advance and as needed
  • Support, support, support! And keep Solo Artist on task 
  • Help troubleshoot with music industry questions like:
    • Publishing album online 
    • Marketing/promotion on social media 
    • Booking performances
    • Etc.
  • Record a “commercially ready” original album and post for sale (iTunes, etc) 
  • Help artist book performance and market their album to friends, family and supporters 
Page 1 of 1

To download a full, editable version

Explore similar resources in Music Production