Extending Music Programming to Additional Rooms

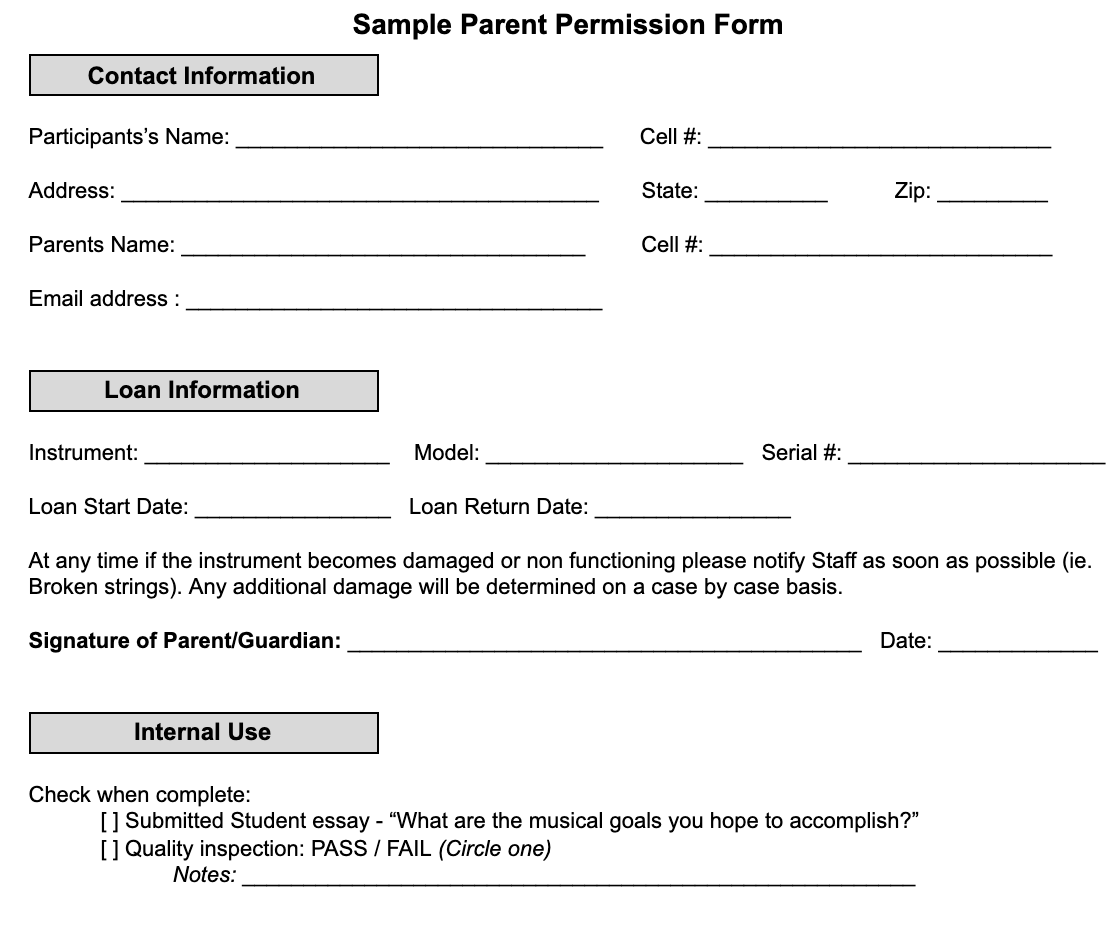
Given the COVID related limitations on the number of youth in a room and limits on contacts with staff members, here are some thoughts on how to have an instructor in one room providing lessons to a group of youth in another room.

Overview

The easiest way to do this is by setting up a Zoom session between an instructor and the various youth participants.  The general idea is that each participant joins the same Zoom session and the instructor can watch them play their music. The instructor can also offer one-on-one feedback by using Breakout Rooms. The following describes the process in greater detail.

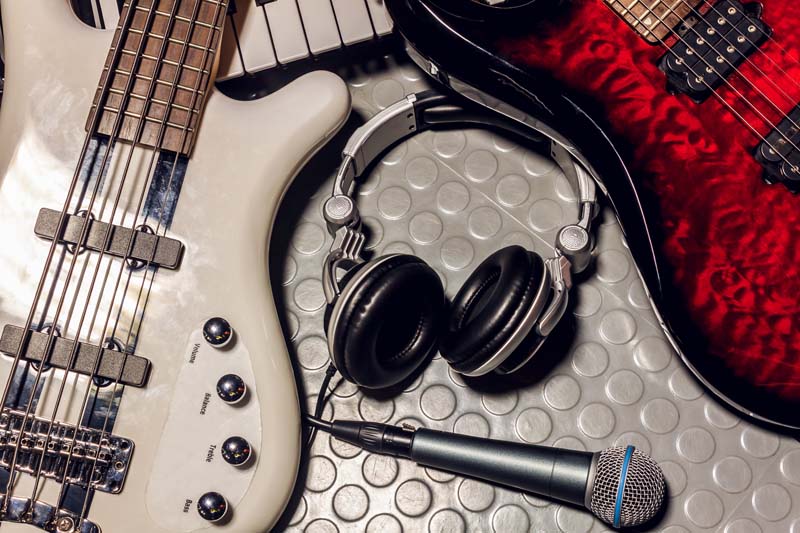
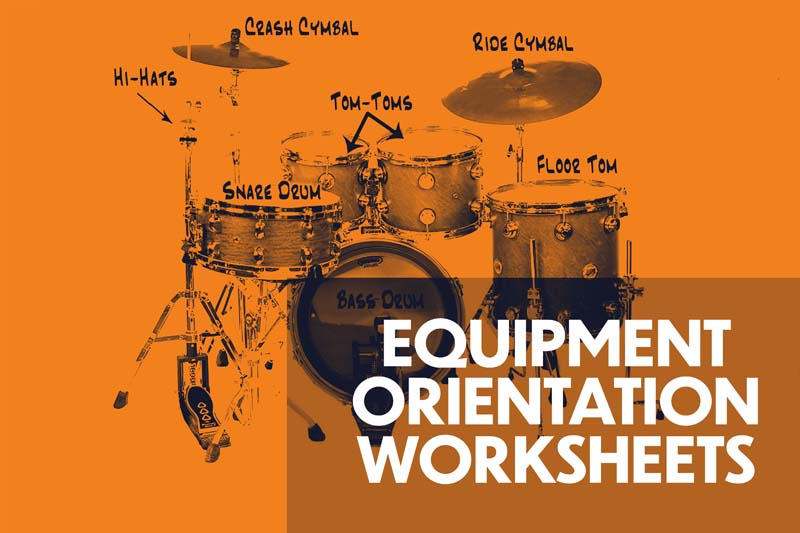
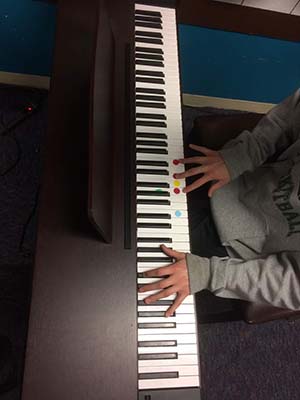
Read More

How to run a Zoom music session

The instructor invites each participant to join the same Zoom session.  Each participant will need to have their own Zoom device to join the session, which could be any of the following:

  • Laptop
  • Desktop
  • Chromebook
  • iPad
  • Smart phone

NOTE: It would be great to be able to connect the instruments or the production equipment directly to the participant’s Zoom device, but unfortunately this capability does not currently exist for Zoom – so the Zoom device really just captures the video and audio of the participant using their instrument or production gear.

The instructor uses Zoom to see and hear every participant as they perform  

  • The instructor runs a workshops without being physically present with the participants
    • All participants sign into the same Zoom meeting 
    • Instructor provides participants with general instructions and expectations for the lesson 
    • Participants can all be in the same room, or they can be isolated in different rooms
  • Using Zoom breakout rooms
    • With Zoom breakout rooms, each participant can be in their own breakout room to get individual instruction, and then be added back into the larger Zoom session for group instruction.  
    • The instructor enables Zoom “Breakout” rooms (https://youtu.be/Zc5GkepLIVQ
    • Participants could be assigned to different breakout rooms depending on things such as their: 
      • Skill
      • Song choice
      • Instrument 

Musical Equipment Recommendations

In order to get the best musical sound using the built in microphone of each Zoom device, we would suggest following these guidelines for the various Workshops your instructor might lead.  

  • Voice Workshops
    • For basic Voice workshops you can use the built in microphone of the device your participant is using to connect to Zoom.  This may not be of high quality, but is fine for this purpose.
    • Optional – Advanced setups could include an external microphone and audio interface
  • Guitar, Bass and Ukulele Workshops
    • Each of these instruments generates its own sound which can be picked up by the built in microphone your participant is using for Zoom. 
    • For each instrument you will need:
      • Acoustic guitar – guitar, stand, tuner, and pick 
      • Electric and/or Bass guitar – guitar, stand, small amp, instrument cable, tuner, and pick 
      • Ukulele – Ukulele, and tuner
    • Recommended Equipment: 
      • Electric Guitar/bass – Fender Strat Squire or Epiphone Les Paul style (or equivalent) with practice amp
      • Yamaha JR1 3/4-size Acoustic Guitar – $150/each
      • Include a bag/case (if available) 
      • Note: ¾ size guitars may be easier for various ages to use (if available) 
      • Kala Ukulele Starter Kit – $60/each
  • Drum Workshops
    • The drums generate their own sound which can be picked up by the built in microphone your participant is using for Zoom. 
    • Each drum set will need:
      • Practice pad – Pad and sticks
        • Optional – Pad mount/stand (otherwise – setup on desks/tables) 
      • Electric Drum pad – Electronic drum pad and sticks 
    • Recommended Equipment: 
  • Beat Making Workshops
    • We highly recommend using an iPad-based Portable Music Production Station – $1200/each.  This will give each participant an iPad, midi-keyboard, microphone and controller – everything they need for making beats.

Additional Resources: 

To download a full, editable version

Instrument Loaner Program

Give your participants access to instruments while at home

Covid-19 has been disruptive to many after school programs and many participants can’t afford to have instruments at home.  Give your participants access to instruments and production equipment to help them continue to make music at home. The types of instruments have been specifically selected for at home use and can help music program staff implement virtual lessons and projects.

NOTE: Any featured products are based on the experience and opinions of Network members and Music & Youth. We do not receive any financial benefit from the vendors to promote their products. We just thought they were helpful and you might like ’em. 

Best Instruments for At-Home Use:

Music Production Package – $220
Focusrite Scarlett Solo Studio Recording Bundle
Singer/songwriter Package – $150
Shure MV5 Digital Condenser Microphone Bundle
Acoustic Guitar Package – $170
Yamaha JR1 (w/bag)($150/ea, Tuner – $10/ea, Picks – $3.50/pack, Strap $6/ea) 
Ukulele Package – $60 
Kala Ukulele Starter Kit
Drummer Package – $160
Pyle PTED06 Electronic Drum pad
or…
Drum pad/sticks Kit – $25 
Evans RealFeel Drum Pad and Drumsticks
Digital Piano Package – $120
Casio Casiotone CT-S200

Example Requirements – Below are some examples that other organizations have used – Customize the requirements to meet your needs: 

  • Permissions – Parent Permission and registration materials (see sample below) 
  • Participation – Participation in virtual workshops and performances and 150-word essay answering – “What are the musical goals you hope to accomplish?”
  • Equipment – Participants and parents assume responsibility of caring for instruments and damage (other than general wear and tear) and Prompt return at Loan Due Return Date

Read More

To download a full, editable version

Explore similar resources in Instrument Programming

Using the Nashville Number System to Create Bands

Skip instrument “lessons” and get participants to play in bands from day #1

ive your participants the ultimate musical experience by getting them to play their favorite songs in a band on the very first day. Youth participants are empowered by choosing their instrument, song, bandmates, and stage name. Your role is to simplify the chord progressions or drum beats (ie. root notes) and get the band to play along with the recording while performing on stage. Instead of weekly “lessons,” participants attend a regular band rehearsal with the goal of performing at a showcase performance each month. 

Read More

How to… 

Before participants arrive 

  • Prepare an approved Song List on a white board (ie. popular songs for participants to choose from) 
    • Limited song options from a common playlist gives participants a sense “guided choice” 
    • Allows the staff to prepare learning materials for a realistic amount of songs, including, tempo/key signature, progression shorthand (ie. Nashville # system), and song form
    • Add individual progressions for Verse, Chorus, Pre-Chorus, Bridge, etc. 
    • Print lyric sheets (if needed) 
      • Create a playlist on Spotify or Apple Music for quick access
  • Tape and label instruments
Guitar/bassPiano 
Use white Gaffers tape to label frets with chord function. Move tape for each songParticipants play root notes using one finger on one stringLabel keys with chord function using tape or dry erase markersParticipants play root notes using one finger 
Page 1 of 3

To download a full, editable version

Explore similar resources in Instrument Programming

“Karate Belt” Reward System

Want ninja level musicians?! Help your participants earn a musical “black belt.”  

A black belt in karate is a badge of honor representing the highest level of skill. The “Karate Belt” Reward System uses different color guitar picks (similar to “karate belts”) to reward participants’ progress and motivate them to achieve their goals on instruments or music technology.

Read More

How to…

  • Determine what skills participants must demonstrate in order to “level up” on each instrument or music technology gear. Then print and display the “karate belt” requirements for each instrument.
    • The Sample “Karate Belt” Reward System Achievements chart below uses 5 colors, each representing different levels of achievement plus an exclusive club called “The Red-Hot Pick Society” for anyone earning a purple pick on 3 or more instruments
  • Create an incentive chart to visually track and help motivate participants’ achievements.
  • With help from instructors, participants work to earn each colored guitar pick to add to their necklace.
    • Note: If a participant earns their “Yellow” rank in more than one instrument, no need to give them another yellow guitar pick for their necklace. Instead, simply note their achievement on the incentive board.
  • Participants wear their multi-colored guitar pick necklace that proudly displays their rank.

The recommended equipment list below is an example that would serve approximately 30 participants. Your needs and quantities may vary (depending on # of participants).

Page 1 of 2 (full text available in download) 
To download a full, editable version 

Explore similar resources in Instrument Programming

New Participant Orientation Tools

Expecting lots of new kids this semester? Set them up for success with these handy tools!

Download the bundle of ALL of the New Participant Orientation Tools

or choose an individual resource

New Participant Orientation Process

New Participant Orientation Process

Help break the ice and welcome new participants so they can make music right away! ...
Establishing House Rules

Establishing House Rules

Set expectations and ensure proper use of the equipment and facilities. Your Music Studio likely ...
Equipment Orientation Worksheets

Equipment Orientation Worksheets

Focus on helping participants MAKE MUSIC right away by conducting short equipment orientations to get ...
Musical Poster Boards

Musical Poster Boards

Large posters you can print and hang in your music room to help remind participants ...

New Participant Orientation Process

Help break the ice and welcome new participants so they can make music right away!  

For participants new to your Music Studio, stepping into a recording studio or picking up an instrument for the first time can be intimidating. Some beginners are so excited to get started that they can hardly stand it! Others may feel intimidated, nervous, or shy.  One way to help new participants feel welcome is to implement an Equipment Orientation Process.

Equipment orientations are for first time users of music technology or instruments. The goal is to show new participants the basics of the equipment and get them playing as soon as possible. 

Read More

How to…

Orientations are a great way for the staff to get to know the participants on a personal level and a great way to start building trust.  Keep the orientations low key and low stress.  The primary goal is to make a new participant comfortable and to demystify instruments or production technology.  

Step One:

  • Orientations can be one-on-one or in a group setting.
  • Explain equipment rules and expectations to help prevent damage
  • Encourage participants to treat instruments and gear with respect

Step Two:

  • For instrumentalists
    • Explain the working parts of the instrument and how to hold it
    • Have them chose a simple popular song and teach them to play it right away
  • For producers
    • Have them produce a “demo”
    • The total project should be at least 32 bars long
    • Distinct “A” and “B” sections
    • Minimum of 5 tracks (At least one track performed live by the participant then quantized)     
  • Conduct a simple verbal “Quiz” to reinforce knowledge of the basics

Some helpful hints:

  • Avoid long lectures – Keep the orientation to 10-15 minutes max
  • Encourage participants to choose the equipment they want to try out, at their own pace 
  • Start with only “need-to-know” information to get some quick success
  • Help participants make music right away – keep it short and simple!

To download a full, editable version

You may also want to download… 

Download editable Sample House Rules 
Download the bundle of all Orientation Worksheets

Explore similar resources in Instrument Programming

“Sticky” Instrument Challenges

Want beginners to have instant success on instruments? Forget notation and pick up some tape or stickers!

“Sticky” Instrument Challenges are a great way to “gamify” your music program and expose participants to new things without having to learn music theory/notation first. At the start of each day, introduce several Instrument Challenges for participants to choose from (on different instruments). For example, participants have to complete a challenge in order to “unlock” privileges like using the recording studio, or instrument equipment, etc. “Sticky” Instrument Challenges help introduce basic concepts and gives participants success right away in hopes that they “stick” with it.

Read More

How to…

  • Decide how often you’ll introduce the Instrument Challenges challenge. For example,
    • Every day – choose a specific time, etc. 
    • Each week (e.g. every Wednesday – or whatever day you choose) 
  • Decide on the format of the challenge – ie. everyone must complete or make it an optional challenge that helps participants earn extra privileges, etc.  
  • Make it easy for all skill levels to complete the challenges; examples include: 
    • Piano – use “Avery See-Through Removable Color Dots”, Post-it Page Markers (multi-color pack), Multi-colored dry erase markers 
    • Guitar/bass – use masking tape along the top of the neck/fretboard – label the fret number in sequence 
    • Drums – use an easy “play along” track, YouTube clip or take a video of an instructor playing a basic groove.  
  • Create fun challenges that participants must complete before participating in other programs/activities (displayed on a white board). Examples include: 
    • “Chord Buster” – Participants must play through a I-IV-V progression.  
      • Piano – Green dots = C Major chord, Red dots = F Major, Blue dots = G Major
      • Guitar/bass – #1 = Low E string, 8th fret (C); #2 = Low E string, 1st fret (F); #3 = Low E string, 3rd fret (G)
    • “Melody Mystery” – Place a sequence of colored dots or label fretboard that participants must “decode” in order to play a familiar melody.
    • “Octave Obsession” – Place colored dots or label fretboard on various octaves, and discuss the basic concept of what participants are playing.
    • “Scale Trail” – Place colored dots or label fretboard on various scales and discuss key signatures with participants.
    • “Intricate Intervals” – Place colored dots or label fretboard on basic scale intervals for a quick ear training exercise.
    • “Groove Master” – ask participants to recreate a drum groove on a video or recording
    • “Rhythm Xerox” – participants have to repeat a series of rhythms 
  • Optional – Use the same concepts for helping participants on music technology equipment 

To download a full, editable version

Explore similar resources in Instrument Programming

VIP Band Program

Motivate your Very Important Participants to become Virtuoso Instrument Players!

Avoid the musical progress plateau with your participants by motivating and challenging them with an exclusive VIP Band program opportunity. Each week, Junior band participants (age 13-15) and Senior band participants (age 16-18) participate in exclusive Workshops and programs that help build skills in their chosen instrument. Participants in this program are expected to attend weekly instrument and/or studio Workshops to develop their musical knowledge and music technology expertise. They will work closely with their bandmates to build strong bonds with their peers. VIP Band participants have opportunities to play at  higher stakes performance opportunities in the community, developing a sense of pride in their hard work and dedication. 

Read More

How to… 

Participants in the VIP Band Program are divided into two bands.  Each group is typically limited to no more than 10-12 participants: 

  • Junior Band: ages 13-15
  • Senior Band: ages 16-18 

Each week, VIP Band members commit to: 

  • Participating in their choice of Instrument Workshop/s 
    • Attend a at least one weekly Workshop series such as guitar, bass, drums, piano, vocals, lyric writing, music production or music business
    • Each participant is encouraged to stick to their chosen instrument for the entire semester but can change their instrument choice at the start of a new semester
  • Expanding their Musical Knowledge 
  • Learn and apply the basics of music (like rhythm, harmony, melody and notation basics) on their chosen instrument
  • Project – Compose an original 16-32 bar song by the end of each semester
  • Participating in Music Production projects
    • Such as “Sound-alike” projects, iPad beat making, Recording Studio sessions
    • Project suggestion – Record an original song with distinct “A” and “B” sections by the end of each semester
  • Joining a band
    • Learn rehearsal and performance techniques 
    • Project suggestion – Perform in one Open Mic night by the end of the semester

Tracking VIP participants’ progress: 

  • Create a poster board tracking sheet
  • Participants get a stamp in the category activity they’ve completed each week. Visually displaying progress is motivational to the participants.
  • VIP’s must have 3 stamps at the end of each week, 12 stamps at the end of each month

Sample VIP Band Incentives: 

  • First to know about concert tickets, field trips
  • Prioritized Recording Session time
  • High profile performance opportunities (galas, fundraisers, community events, etc.) 
  • Opportunities for a music video shoot
  • Monthly rewards, raffles, prizes
  • Music books, lyric books, pick necklaces, VIP-only party (ice cream, movie night)
Page 1 of 2

To download a full, editable version

Explore similar resources in Instrument Programming