Want beginners to have instant success on instruments? Forget notation and pick up some tape or stickers!
“Sticky” Instrument Challenges are a great way to “gamify” your music program and expose participants to new things without having to learn music theory/notation first. At the start of each day, introduce several Instrument Challenges for participants to choose from (on different instruments). For example, participants have to complete a challenge in order to “unlock” privileges like using the recording studio, or instrument equipment, etc. “Sticky” Instrument Challenges help introduce basic concepts and gives participants success right away in hopes that they “stick” with it.
Read More
How to…
Decide how often you’ll introduce the Instrument Challenges challenge. For example,
Every day – choose a specific time, etc.
Each week (e.g. every Wednesday – or whatever day you choose)
Decide on the format of the challenge – ie. everyone must complete or make it an optional challenge that helps participants earn extra privileges, etc.
Make it easy for all skill levels to complete the challenges; examples include:
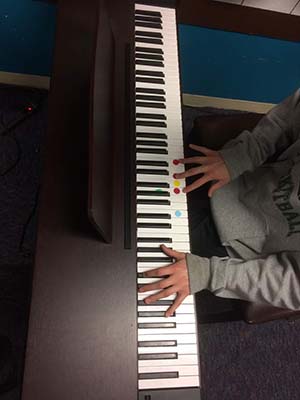
Piano – use “Avery See-Through Removable Color Dots”, Post-it Page Markers (multi-color pack), Multi-colored dry erase markers
Guitar/bass – use masking tape along the top of the neck/fretboard – label the fret number in sequence
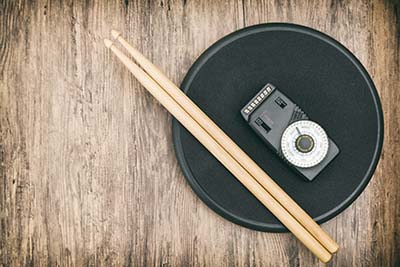
Drums – use an easy “play along” track, YouTube clip or take a video of an instructor playing a basic groove.
Create fun challenges that participants must complete before participating in other programs/activities (displayed on a white board). Examples include:
“Chord Buster” – Participants must play through a I-IV-V progression.
Piano – Green dots = C Major chord, Red dots = F Major, Blue dots = G Major
Guitar/bass – #1 = Low E string, 8th fret (C); #2 = Low E string, 1st fret (F); #3 = Low E string, 3rd fret (G)
“Melody Mystery” – Place a sequence of colored dots or label fretboard that participants must “decode” in order to play a familiar melody.
“Octave Obsession” – Place colored dots or label fretboard on various octaves, and discuss the basic concept of what participants are playing.
“Scale Trail” – Place colored dots or label fretboard on various scales and discuss key signatures with participants.
“Intricate Intervals” – Place colored dots or label fretboard on basic scale intervals for a quick ear training exercise.
“Groove Master” – ask participants to recreate a drum groove on a video or recording
“Rhythm Xerox” – participants have to repeat a series of rhythms
Optional – Use the same concepts for helping participants on music technology equipment
Help participants develop their ear and the critical listening skills that are nearly impossible to notate
Critical listening skills like tone, intonation, and groove are universal and highly sought after by all musicians. These skills are also often overlooked or taken for granted in favor of traditional music education skills like music theory and reading skills. Help your participants become well rounded musicians by developing their ear, overall critical listening skills in their playing or music productions. Below are a few ideas on how to help your participants accurately identify and communicate music elements and use them in their own playing or songwriting.
Read More
How to…
Be creative in how you communicate musical skills in instrument workshops, ensembles and/or music productions.
Some ideas for Big Ears workshops include (but not limited to):
Music Theory:
Find the Note: Play a note on piano and have other instrumentalists match the pitch on their instrument
Intervals: Give starting notes and find second note based on reference of sound. Limit options to Major, Minor 3rd, etc.
Identify Chords: Determine whether chords in root position are minor or major. Move chords around but don’t invert. Make it easy at first and build from there.
Transcribe: Figure out a guitar line/chords by ear.
Music Production/Engineering:
Listen as a Producer: Describe instrumentation and explain arrangement. How many hooks? Any interludes? Etc.
Mixing: Working through a mix and talking through the different instruments and how we handle certain frequency ranges
Physics of Sound: How does sound travel? What are frequencies, how are they measured, and what are the frequency ranges instruments play in?
Songwriting:
Rhyme Schemes: What type of rhyme schemes is the artist using? Slant rhymes, or perfect rhymes?
Lyrical Imagery: Is the artist using metaphor, simile, alliteration? What does it make you feel or visualize?
Performance: What type of emotion is the artist using on the track? How does it support the lyrics?
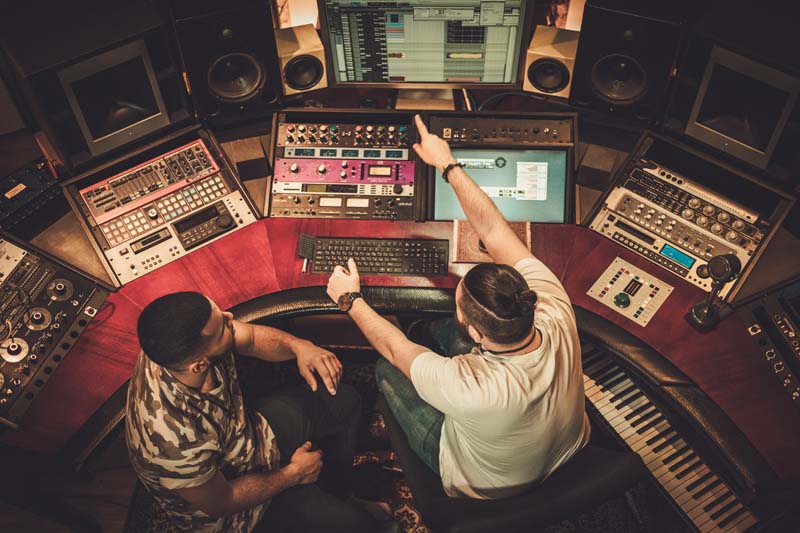
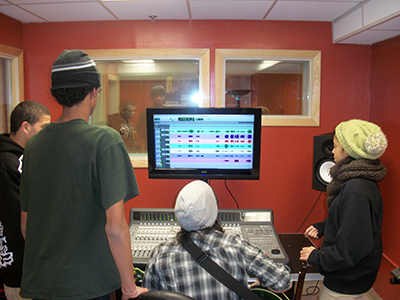
Demystify complicated studio gear and get participants making beats right away
What better way to teach all the basics of the recording studio than to have participants create a couple projects of their own?! Engage your new or beginner participants with a real-world project while they learn the expectations for handling studio equipment and basic music production concepts and techniques.
Read More
How to…
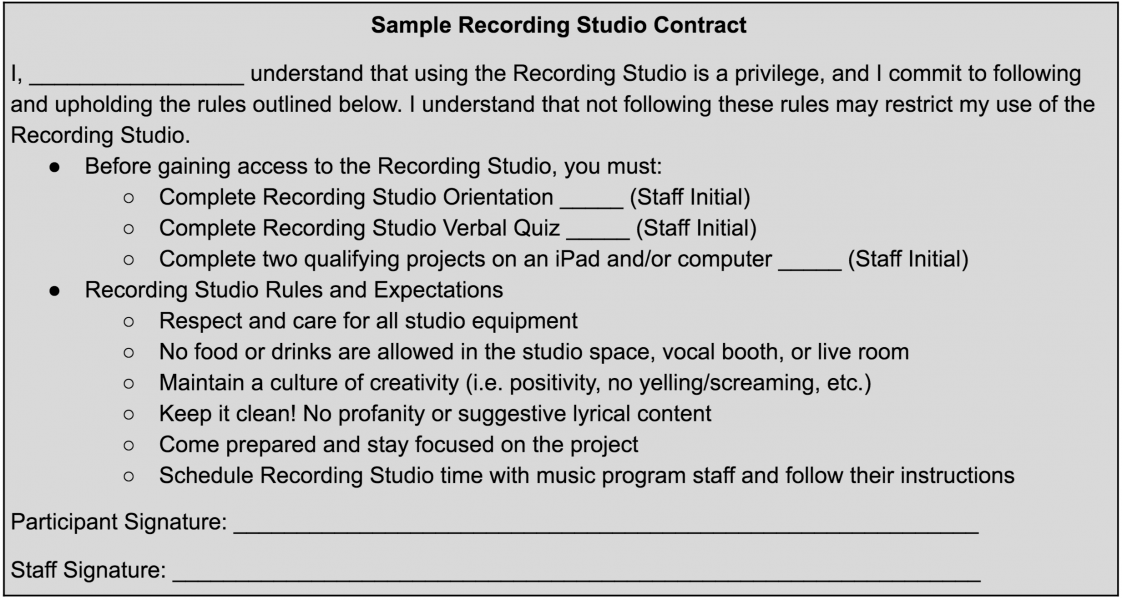
Participants complete a Recording Studio Orientation to learn:
Studio Rules and Expectations (see following “Sample Recording Studio Contract”)
How to use and take care of all studio equipment
Basics of studio equipment and their functions
How to properly turn on and shut down studio equipment
How to set up a basic Logic Pro X project (i.e. new tracks, check levels, and record enable)
Conduct a simple verbal quiz to make sure participants have learned the names of all studio equipment
Have participants produce two basic “demo” Music Production projects using iPad Workstations or computer workstations following this process:
GarageBand project at least 32 bars long
Distinct “A” and “B” sections
Minimum of 5 tracks
At least one track performed live by the participant then quantized (others can be Apple loops)
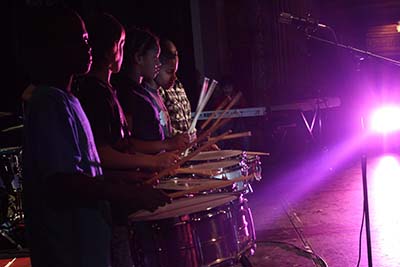
Drums, buckets, or chairs – if you can hit it with drumsticks, you can create a drumline.
Objective: Feel the rhythm with large groups of participants
● Teach the basics of drumming and rhythm
● Develop critical listening skills
● Fun way to engage large groups of participants
Motivate your Very Important Participants to become Virtuoso Instrument Players!
Avoid the musical progress plateau with your participants by motivating and challenging them with an exclusive VIP Band program opportunity. Each week, Junior band participants (age 13-15) and Senior band participants (age 16-18) participate in exclusive Workshops and programs that help build skills in their chosen instrument. Participants in this program are expected to attend weekly instrument and/or studio Workshops to develop their musical knowledge and music technology expertise. They will work closely with their bandmates to build strong bonds with their peers. VIP Band participants have opportunities to play at higher stakes performance opportunities in the community, developing a sense of pride in their hard work and dedication.
Read More
How to…
Participants in the VIP Band Program are divided into two bands. Each group is typically limited to no more than 10-12 participants:
Junior Band: ages 13-15
Senior Band: ages 16-18
Each week, VIP Band members commit to:
Participating in their choice of Instrument Workshop/s
Attend a at least one weekly Workshop series such as guitar, bass, drums, piano, vocals, lyric writing, music production or music business
Each participant is encouraged to stick to their chosen instrument for the entire semester but can change their instrument choice at the start of a new semester
Expanding their Musical Knowledge
Learn and apply the basics of music (like rhythm, harmony, melody and notation basics) on their chosen instrument
Project – Compose an original 16-32 bar song by the end of each semester
Participating in Music Production projects
Such as “Sound-alike” projects, iPad beat making, Recording Studio sessions
Project suggestion – Record an original song with distinct “A” and “B” sections by the end of each semester
Joining a band
Learn rehearsal and performance techniques
Project suggestion – Perform in one Open Mic night by the end of the semester
Tracking VIP participants’ progress:
Create a poster board tracking sheet
Participants get a stamp in the category activity they’ve completed each week. Visually displaying progress is motivational to the participants.
VIP’s must have 3 stamps at the end of each week, 12 stamps at the end of each month
Sample VIP Band Incentives:
First to know about concert tickets, field trips
Prioritized Recording Session time
High profile performance opportunities (galas, fundraisers, community events, etc.)
Opportunities for a music video shoot
Monthly rewards, raffles, prizes
Music books, lyric books, pick necklaces, VIP-only party (ice cream, movie night)